<?xml version="1.0" encoding="utf-8"?>
<feed xmlns="http://www.w3.org/2005/Atom">
  <title>テクノロジーで楽がしたい</title>
  
  <subtitle>暗夜一燈、鶏口牛後</subtitle>
  <link href="/atom.xml" rel="self"/>
  
  <link href="http://blog.machine-powers.net/"/>
  <updated>2018-09-30T15:06:38.259Z</updated>
  <id>http://blog.machine-powers.net/</id>
  
  <author>
    <name>Atsuyoshi Suzuki</name>
    
  </author>
  
  <generator uri="http://hexo.io/">Hexo</generator>
  
  <entry>
    <title>Raspbian Lite （2018-06-27）のセットアップ</title>
    <link href="http://blog.machine-powers.net/2018/08/08/setup-raspbian-lite/"/>
    <id>http://blog.machine-powers.net/2018/08/08/setup-raspbian-lite/</id>
    <published>2018-08-08T13:45:00.000Z</published>
    <updated>2018-09-30T15:06:38.259Z</updated>
    
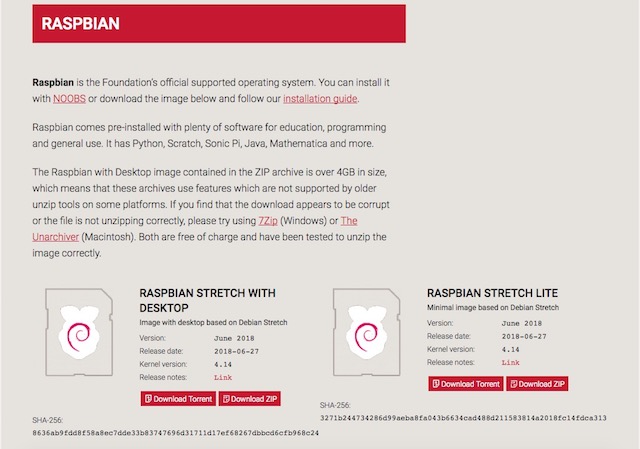
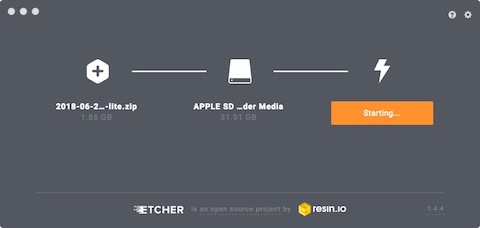
    <content type="html"><![CDATA[<p>Rapsberry Pi（以下、ラズパイ）甩のOSであるRaspbianの軽量バージョン、Raspbian Liteのセットアップ方法を解説します。</p><p>GUIを使用せずサーバー用途で使用することを想定しています。<br>また、本記事ではディスプレイを接続せずに作業します。<br><a id="more"></a></p><h2><span id="目次">目次</span><a href="#目次" class="header-anchor">#</a></h2><div class="toc"><!-- toc --><ul><li><a href="#ハードウェアなど">ハードウェアなど</a></li><li><a href="#準備">準備</a><ul><li><a href="#osイメージのダウンロード">OSイメージのダウンロード</a></li><li><a href="#microsdへの書き込み">microSDへの書き込み</a></li></ul></li><li><a href="#セットアップ">セットアップ</a><ul><li><a href="#準備-1">準備</a></li><li><a href="#電源投入">電源投入</a></li></ul></li><li><a href="#ssh経由でセットアップ">SSH経由でセットアップ</a><ul><li><a href="#パッケージのアップデート">パッケージのアップデート</a></li><li><a href="#ファームウェアの更新">ファームウェアの更新</a></li><li><a href="#パスワード変更">パスワード変更</a></li><li><a href="#パッケージの追加">パッケージの追加</a></li></ul></li><li><a href="#そのほか">そのほか</a><ul><li><a href="#温度の確認">温度の確認</a></li><li><a href="#raspbianのシャットダウン">Raspbianのシャットダウン</a></li></ul></li><li><a href="#まとめ">まとめ</a></li></ul><!-- tocstop --></div><h2><span id="ハードウェアなど">ハードウェアなど</span><a href="#ハードウェアなど" class="header-anchor">#</a></h2><ul><li>Raspberry Pi model 3B+</li><li>microSD 32GB</li><li>ディスプレイ、キーボード、マウスは接続せず</li></ul><p>microSDへのOSイメージの書き込みはmacOSから。</p><h2><span id="準備">準備</span><a href="#準備" class="header-anchor">#</a></h2><h3><span id="osイメージのダウンロード">OSイメージのダウンロード</span><a href="#osイメージのダウンロード" class="header-anchor">#</a></h3><p><img src="/images/raspbian-lite/raspbian_download.jpg" alt="ダウンロードページ"></p><p><a href="https://www.raspberrypi.org/downloads/raspbian/" target="_blank" rel="noopener">Download Raspbian for Raspberry Pi</a></p><p>右側の”Download Zip”というリンクをクリックしてダウンロード。</p><p>チェックサムの確認。Linuxの場合は<code>sha256sum</code>というコマンドです。</p><figure class="highlight console"><table><tr><td class="code"><pre><span class="line"><span class="meta">$</span><span class="bash"> shasum -a 256 ~/Downloads/2018-06-27-raspbian-stretch-lite.zip</span></span><br></pre></td></tr></table></figure><p>表示されるチェックサムが上記のダウンロードページに記載のものと一致していればOKです。</p><h3><span id="microsdへの書き込み">microSDへの書き込み</span><a href="#microsdへの書き込み" class="header-anchor">#</a></h3><p>OSイメージの書き込みには<a href="https://etcher.io/" target="_blank" rel="noopener">Etcher</a>を使用します。</p><p>microSDをSDカードリーダーにセットしてEtcherを起動。</p><p><img src="/images/raspbian-lite/etcher_start.jpg" alt="EtcherによるOSイメージの書き込み"></p><p>書き込み先を間違えないように注意。</p><ol><li>書き込むSDイメージを指定</li><li>書き込み先のSDカードリーダーを選択（容量をよく見る）</li><li>“FLASH!”をクリック</li><li>完了するまで待つ。</li></ol><p>一度microSDを取り外す。</p><h2><span id="セットアップ">セットアップ</span><a href="#セットアップ" class="header-anchor">#</a></h2><h3><span id="準備">準備</span><a href="#準備" class="header-anchor">#</a></h3><p>SSHが自動起動するように設定します。Raspbianの独自機能としてmicroSDの<code>boot</code>直下に<code>ssh</code>という名前の空のファイルを作成しておくと起動時にSSHが自動的に起動する仕組みになっています。</p><p>先ほどOSイメージを書き込んだmicroSDをSDカードリーダーにセットする。</p><p><code>/Volumes</code>に<code>boot</code>が存在するかチェック。存在しない場合はmicroSDを一度取り出してもう一度セットし直して下さい。</p><figure class="highlight console"><table><tr><td class="code"><pre><span class="line"><span class="meta">$</span><span class="bash"> ls /Volumes/boot</span></span><br></pre></td></tr></table></figure><p>問題がなければ<code>touch</code>コマンドで空のファイルを作成します。</p><figure class="highlight console"><table><tr><td class="code"><pre><span class="line"><span class="meta">$</span><span class="bash"> touch /Volumes/boot/ssh</span></span><br></pre></td></tr></table></figure><p>無線LAN経由で接続する場合は事前に作成した無線LAN用の設定ファイルをコピーしておく。</p><figure class="highlight console"><table><tr><td class="code"><pre><span class="line"><span class="meta">$</span><span class="bash"> cp wpa_supplicant.conf /Volumes/boot/wpa_supplicant.conf</span></span><br></pre></td></tr></table></figure><p>参考：<a href="https://a244.hateblo.jp/entry/2018/01/15/011414#%E4%B8%8B%E6%BA%96%E5%82%99" target="_blank" rel="noopener">Raspberry Pi Zero W のセットアップ - ながいものには、まかれたくない</a></p><p>マウントを解除してからmicroSDを取り外す（Finderの左ペインのリストから取り出しボタンを押す）。</p><h3><span id="電源投入">電源投入</span><a href="#電源投入" class="header-anchor">#</a></h3><p>Raspberry PiにmicroSDカードをセットして電源ケーブルを接続。</p><p>そのまま暫く待つ。</p><h2><span id="ssh経由でセットアップ">SSH経由でセットアップ</span><a href="#ssh経由でセットアップ" class="header-anchor">#</a></h2><figure class="highlight console"><table><tr><td class="code"><pre><span class="line"><span class="meta">$</span><span class="bash"> ssh pi@raspberrypi.local</span></span><br></pre></td></tr></table></figure><p>初期パスワードは<code>raspberry</code>です。</p><h3><span id="パッケージのアップデート">パッケージのアップデート</span><a href="#パッケージのアップデート" class="header-anchor">#</a></h3><p>まずパッケージデータベースの更新。</p><figure class="highlight console"><table><tr><td class="code"><pre><span class="line"><span class="meta">$</span><span class="bash"> sudo apt update</span></span><br></pre></td></tr></table></figure><p>パッケージをアップデート。</p><figure class="highlight console"><table><tr><td class="code"><pre><span class="line"><span class="meta">$</span><span class="bash"> sudo apt upgrade</span></span><br></pre></td></tr></table></figure><p>念の為<code>sudo reboot</code>で再起動。</p><h3><span id="ファームウェアの更新">ファームウェアの更新</span><a href="#ファームウェアの更新" class="header-anchor">#</a></h3><p>更新前のカーネルバージョンは以下のとおり。</p><figure class="highlight console"><table><tr><td class="code"><pre><span class="line"><span class="meta">$</span><span class="bash"> uname -a</span></span><br><span class="line">Linux raspberrypi 4.14.52-v7+ #1123 SMP Wed Jun 27 17:35:49 BST 2018 armv7l GNU/Linux</span><br></pre></td></tr></table></figure><p><code>rpi-update</code>コマンドでファームウェアを更新します。</p><figure class="highlight console"><table><tr><td class="code"><pre><span class="line"><span class="meta">$</span><span class="bash"> sudo rpi-update</span></span><br></pre></td></tr></table></figure><p>処理が完了するのを確認してから再起動します。</p><p>更新後のカーネルバージョン。</p><figure class="highlight console"><table><tr><td class="code"><pre><span class="line"><span class="meta">$</span><span class="bash"> uname -a</span></span><br><span class="line">Linux raspberrypi 4.14.61-v7+ #1132 SMP Tue Aug 7 15:36:25 BST 2018 armv7l GNU/Linux</span><br></pre></td></tr></table></figure><h3><span id="パスワード変更">パスワード変更</span><a href="#パスワード変更" class="header-anchor">#</a></h3><p>セキュリティ上好ましくないのでパスワードを変更しておきます。<code>passwd</code>コマンドを使います。</p><figure class="highlight console"><table><tr><td class="code"><pre><span class="line"> passwd</span><br><span class="line">Changing password for pi.</span><br><span class="line">(current) UNIX password:</span><br><span class="line">Enter new UNIX password:</span><br><span class="line">Retype new UNIX password:</span><br><span class="line">passwd: password updated successfully</span><br></pre></td></tr></table></figure><h3><span id="パッケージの追加">パッケージの追加</span><a href="#パッケージの追加" class="header-anchor">#</a></h3><p><code>tmux</code>と<code>vim</code>をインストールしておきます。</p><figure class="highlight console"><table><tr><td class="code"><pre><span class="line"><span class="meta">$</span><span class="bash"> sudo apt install tmux vim</span></span><br></pre></td></tr></table></figure><h2><span id="そのほか">そのほか</span><a href="#そのほか" class="header-anchor">#</a></h2><h3><span id="温度の確認">温度の確認</span><a href="#温度の確認" class="header-anchor">#</a></h3><p><code>vcgencmd</code>というコマンドで各種設定や状態を確認できます。</p><figure class="highlight console"><table><tr><td class="code"><pre><span class="line"><span class="meta">$</span><span class="bash"> vcgencmd measure_temp</span></span><br><span class="line">temp=52.1'C</span><br></pre></td></tr></table></figure><p>model 3B+は基板全体が熱を持つようですがCPU温度自体はそれほど高くないようです。</p><p><code>vcgencmd</code>の詳細は以下のページを参照。</p><p><a href="https://elinux.org/RPI_vcgencmd_usage" target="_blank" rel="noopener">RPI vcgencmd usage - eLinux.org</a></p><h3><span id="raspbianのシャットダウン">Raspbianのシャットダウン</span><a href="#raspbianのシャットダウン" class="header-anchor">#</a></h3><p>Raspberry Piには電源スイッチがないので終了時はOSを終了させてから電源ケーブルを引き抜きます。</p><p>OSの終了には<code>halt</code>または<code>shutdown</code>コマンドを使用します。</p><figure class="highlight console"><table><tr><td class="code"><pre><span class="line"><span class="meta">$</span><span class="bash"> sudo halt -p</span></span><br></pre></td></tr></table></figure><p>あるいは<code>shutdown</code>コマンド。</p><figure class="highlight console"><table><tr><td class="code"><pre><span class="line"><span class="meta">$</span><span class="bash"> sudo shutdown -h now</span></span><br></pre></td></tr></table></figure><h2><span id="まとめ">まとめ</span><a href="#まとめ" class="header-anchor">#</a></h2><p>最低限のセットアップとしてはこれで完了です。</p>]]></content>
    
    <summary type="html">
    
      &lt;p&gt;Rapsberry Pi（以下、ラズパイ）甩のOSであるRaspbianの軽量バージョン、Raspbian Liteのセットアップ方法を解説します。&lt;/p&gt;
&lt;p&gt;GUIを使用せずサーバー用途で使用することを想定しています。&lt;br&gt;また、本記事ではディスプレイを接続せずに作業します。&lt;br&gt;
    
    </summary>
    
      <category term="IT" scheme="http://blog.machine-powers.net/categories/IT/"/>
    
      <category term="Software" scheme="http://blog.machine-powers.net/categories/IT/Software/"/>
    
    
      <category term="raspberry-pi" scheme="http://blog.machine-powers.net/tags/raspberry-pi/"/>
    
      <category term="raspbian" scheme="http://blog.machine-powers.net/tags/raspbian/"/>
    
      <category term="lite" scheme="http://blog.machine-powers.net/tags/lite/"/>
    
  </entry>
  
  <entry>
    <title>PyTesseractの使い方</title>
    <link href="http://blog.machine-powers.net/2018/08/06/pytesseract-intro/"/>
    <id>http://blog.machine-powers.net/2018/08/06/pytesseract-intro/</id>
    <published>2018-08-06T10:36:30.000Z</published>
    <updated>2018-09-30T15:06:38.259Z</updated>
    
    <content type="html"><![CDATA[<p>この記事では<a href="https://github.com/tesseract-ocr/tesseract" target="_blank" rel="noopener">Tesseact OCR</a>のPythonラッパー、<a href=""><code>pytesseract</code></a>を紹介します。</p><a id="more"></a><h2><span id="目次">目次</span><a href="#目次" class="header-anchor">#</a></h2><div class="toc"><!-- toc --><ul><li><a href="#pytesseractについて">PyTesseractについて</a></li><li><a href="#セットアップ">セットアップ</a><ul><li><a href="#環境">環境</a></li><li><a href="#インストール">インストール</a></li></ul></li><li><a href="#使い方">使い方</a><ul><li><a href="#pytesseractコマンド">pytesseractコマンド</a></li><li><a href="#ライブラリとして使う">ライブラリとして使う</a></li></ul></li><li><a href="#より高度な使い方">より高度な使い方</a><ul><li><a href="#オプション設定">オプション設定</a></li><li><a href="#box形式">box形式</a></li><li><a href="#tsv形式">TSV形式</a></li><li><a href="#文字方向および言語書字系の検出">文字方向および言語（書字系）の検出</a></li></ul></li><li><a href="#補足">補足</a></li></ul><!-- tocstop --></div><h2><span id="pytesseractについて">PyTesseractについて</span><a href="#pytesseractについて" class="header-anchor">#</a></h2><p>公式リポジトリ：<a href="https://github.com/madmaze/pytesseract" target="_blank" rel="noopener">GitHub - madmaze/pytesseract: A Python wrapper for Google Tesseract</a>  </p><p>コマンド呼び出し方式のTesseractラッパーライブラリ。ライセンスはGPL v3。<br>C/C++ APIを使用する場合に比べて性能面でオーバーヘッドがあるものの、<code>tesseract</code>コマンドさえ動けばいいので互換性絡みの問題に遭遇しにくいのが特徴。</p><p>PillowおよびOpenCv、NumPy形式でデータを受け取ることができる。<br>以前はTesseractが対応している画像ファイルフォーマットが限られていたのでそれなりに有用だった。</p><p>何故かQiitaでよく紹介されている（ライブラリ名に<code>tesseract</code>と入っているからか?）。</p><h2><span id="セットアップ">セットアップ</span><a href="#セットアップ" class="header-anchor">#</a></h2><h3><span id="環境">環境</span><a href="#環境" class="header-anchor">#</a></h3><p>この記事ではmacOSおよびTesseract OCR 4.00.beta.4を対象とします。</p><ul><li>Python 3.6.5</li><li>Tesseract OCR 4.0.0-beta.4</li><li>pytesseract 0.2.4</li><li>Pillow 5.2.0</li></ul><p>Tesseractのバージョンは3.0系でも構いませんが、文字の位置の取得機能は3.05以降でないと機能しません。</p><h3><span id="インストール">インストール</span><a href="#インストール" class="header-anchor">#</a></h3><p>当然ですがTesseract本体がインストールされている必要があります。</p><figure class="highlight mipsasm"><table><tr><td class="code"><pre><span class="line">$ <span class="keyword">brew </span><span class="keyword">install </span>tesseract --HEAD</span><br></pre></td></tr></table></figure><p>現時点でTesseract 4.0系はベータ版のため、<code>--HEAD</code>オプション付きでインストールします。</p><p>Linux環境の場合は<a href="/2018/08/02/learning-tesseract-command-utility/" title="過去記事">過去記事</a>記事参照。  </p><p><code>pip</code>で<code>Pillow</code>と<code>pytesseract</code>をインストールします。</p><figure class="highlight shell"><table><tr><td class="code"><pre><span class="line"><span class="meta">$</span><span class="bash"> pip install pytesseract Pillow</span></span><br></pre></td></tr></table></figure><h2><span id="使い方">使い方</span><a href="#使い方" class="header-anchor">#</a></h2><h3><span id="pytesseractコマンド">pytesseractコマンド</span><a href="#pytesseractコマンド" class="header-anchor">#</a></h3><p><code>pytesseract</code>をインストールすると、<code>pytesseract</code>というコマンドが使えるようになります。ありがたみは薄いですが。</p><figure class="highlight shell"><table><tr><td class="code"><pre><span class="line"><span class="meta">$</span><span class="bash"> pytesseract -l eng sample.jpg</span></span><br></pre></td></tr></table></figure><p><code>-l</code>オプションで言語（データファイルの拡張子を除いた部分）を指定します。<br>引数に画像ファイルを指定すると標準出力に認識結果を表示します。</p><p>動作チェック用のコマンドと言う位置づけかと思います。</p><h3><span id="ライブラリとして使う">ライブラリとして使う</span><a href="#ライブラリとして使う" class="header-anchor">#</a></h3><p>最も単純な使い方の例。</p><figure class="highlight python"><table><tr><td class="code"><pre><span class="line"><span class="keyword">from</span> PIL <span class="keyword">import</span> Image</span><br><span class="line"><span class="keyword">import</span> pytesseract</span><br><span class="line"></span><br><span class="line">print(pytesseract.image_to_string(Image.open(<span class="string">'sample.jpg'</span>))</span><br></pre></td></tr></table></figure><p><code>tesseract</code>コマンドの対応しているフォーマットであれば<code>Image.open()</code>を使用せずに直接ファイルのパスを指定することも可能です。</p><p>画像によっては変化処理の関係で直接<code>tesseract</code>コマンドを呼び出す場合の結果が微妙に変化することがあります。</p><h2><span id="より高度な使い方">より高度な使い方</span><a href="#より高度な使い方" class="header-anchor">#</a></h2><p><code>pytesseract</code>モジュールの関数は以下のとおり。</p><ul><li>get_tesseract_version</li><li>image_to_string</li><li>image_to_boxes</li><li>image_to_data </li><li>image_to_osd </li></ul><h3><span id="オプション設定">オプション設定</span><a href="#オプション設定" class="header-anchor">#</a></h3><p><code>image_to_XXX</code>形式の関数の引数は以下のとおり。</p><ul><li>image: 画像ファイル名またはPillow Image、Numpy array</li><li>lang: 言語名（省略した場合はNone(eng)）</li><li>config: <code>tesseract</code>コマンドに渡すオプション</li><li>nice: <code>tesseract</code>コマンドの優先順位（省略した場合は0）</li><li>output_type: 出力形式（省略した場合はOutput.STRING(<code>str</code>)）</li></ul><p>言語とページセグメンテーションモードの指定。</p><figure class="highlight python"><table><tr><td class="code"><pre><span class="line"><span class="keyword">from</span> PIL <span class="keyword">import</span> Image</span><br><span class="line"><span class="keyword">import</span> pytesseract</span><br><span class="line"></span><br><span class="line">print(pytesseract.image_to_string(Image.open(<span class="string">'test_jpn_01.jpg'</span>), lang=<span class="string">'jpn'</span>, config=<span class="string">'--psm 6'</span>))</span><br></pre></td></tr></table></figure><p><code>image_to_XXX</code>形式の関数の<code>output</code>オプションの詳細です。</p><p>指定できる形式は以下の3種類。</p><ul><li>Output.DICT: 辞書形式（キーごとにリスト形式）</li><li>Output.STRING: デフォルト</li><li>Output.BYTES: <code>bytes</code>オブジェクトのリスト</li></ul><figure class="highlight python"><table><tr><td class="code"><pre><span class="line">print(pytesseract.image_to_string(<span class="string">'sample.jpg'</span>, lang=<span class="string">'eng'</span>, config=<span class="string">'--psm 6'</span>, output_type=pytesseract.Output.DICT))</span><br></pre></td></tr></table></figure><p><code>Output.DICT</code>を指定した場合の出力例。</p><figure class="highlight plain"><figcaption><span>出力例（Output.DICT）</span></figcaption><table><tr><td class="code"><pre><span class="line">```</span><br><span class="line">&#123;&apos;text&apos;: &apos;The quick brown fox jumped over the lazy dogs.&apos;&#125;</span><br></pre></td></tr></table></figure><h3><span id="box形式">box形式</span><a href="#box形式" class="header-anchor">#</a></h3><p>座標系は左下原点系。</p><figure class="highlight python"><table><tr><td class="code"><pre><span class="line"><span class="keyword">from</span> PIL <span class="keyword">import</span> Image</span><br><span class="line"><span class="keyword">import</span> pytesseract</span><br><span class="line"></span><br><span class="line">boxes = pytesseract.image_to_boxes(<span class="string">'sample.jpg'</span>, lang=<span class="string">'eng'</span>, config=<span class="string">'--psm 6'</span>)</span><br><span class="line">print(boxes)</span><br></pre></td></tr></table></figure><p><code>image_to_boxes()</code>の戻り値は<code>tesseract</code>コマンドに<code>tsv</code>という<code>config</code>ファイルを指定して実行した際の出力と同様です。</p><p>左から文字、左下座標(x, y)、右上座標(x, y)、ページ番号という形式です。</p><p>詳細：<a href="https://github.com/tesseract-ocr/tesseract/wiki/Training-Tesseract-%E2%80%93-Make-Box-Files" target="_blank" rel="noopener">Training Tesseract – Make Box Files · tesseract-ocr/tesseract Wiki · GitHub</a></p><h3><span id="tsv形式">TSV形式</span><a href="#tsv形式" class="header-anchor">#</a></h3><p>座標系は左上原点系。内部的には<code>tesseract</code>コマンドに<code>tsv</code>という<code>config</code>ファイルを指定して実行しているだけです。</p><figure class="highlight python"><table><tr><td class="code"><pre><span class="line">data = pytesseract.image_to_data(<span class="string">'sample.jpg'</span>, lang=<span class="string">'eng'</span>, config=<span class="string">'--psm 6'</span>)</span><br></pre></td></tr></table></figure><p>戻り値はタブ区切りテキスト形式のデータ（Stringオブジェクト）です。</p><p><code>cvs</code>モジュールかPandasと組み合わせてパースする必要があります。</p><figure class="highlight python"><table><tr><td class="code"><pre><span class="line"><span class="keyword">from</span> PIL <span class="keyword">import</span> Image</span><br><span class="line"><span class="keyword">import</span> pytesseract</span><br><span class="line"><span class="keyword">import</span> cvs</span><br><span class="line"></span><br><span class="line">data = pytesseract.image_to_data(<span class="string">'sample.jpg'</span>, lang=<span class="string">'eng'</span>, config=<span class="string">'--psm 6'</span>)</span><br><span class="line">tsv = csv.reader(data.splitlines, delimiter=<span class="string">'\t'</span>)</span><br><span class="line"></span><br><span class="line"><span class="keyword">for</span> row <span class="keyword">in</span> tsv:</span><br><span class="line">  print(row)</span><br></pre></td></tr></table></figure><p>1行目がヘッダ行なので<code>cvs.DictReader()</code>を使うことも可能です。</p><figure class="highlight python"><table><tr><td class="code"><pre><span class="line"><span class="keyword">from</span> PIL <span class="keyword">import</span> Image</span><br><span class="line"><span class="keyword">import</span> pytesseract</span><br><span class="line"><span class="keyword">import</span> cvs</span><br><span class="line"></span><br><span class="line">data = pytesseract.image_to_data(<span class="string">'sample.jpg'</span>, lang=<span class="string">'eng'</span>, config=<span class="string">'--psm 6'</span>)</span><br><span class="line"></span><br><span class="line">tsv = csv.DictReader(data.splitlines(), delimiter=<span class="string">'\t'</span>)</span><br><span class="line"><span class="keyword">for</span> row <span class="keyword">in</span> tsv :</span><br><span class="line">    print(row[<span class="string">'text'</span>], row[<span class="string">'conf'</span>])</span><br></pre></td></tr></table></figure><p>各列の値について下記のとおり。基本的に英単語の略称です。</p><ul><li>level: レイアウト解析結果のレベル（ページ、ブロック、段落など）</li><li>page_num: ページ番号</li><li>block_num: ブロック番号</li><li>par_num: 段落番号</li><li>line_num: 行番号</li><li>word_num: 単語番号</li><li>left, top, width, height: 文字を囲むボックスの左上角の座標と幅、高さ</li><li>conf: 確からしさ</li><li>text: 認識結果の文字列</li></ul><p>分かち書きをしない言語では中途半端な位置で区切って単語扱いされる。<br>辞書にある単語以外はn-gramで区切られているように見えますがドキュメントに記載はありません。</p><h3><span id="文字方向および言語書字系の検出">文字方向および言語（書字系）の検出</span><a href="#文字方向および言語書字系の検出" class="header-anchor">#</a></h3><figure class="highlight lisp"><table><tr><td class="code"><pre><span class="line">print(<span class="name">pytesseract</span>.image_to_osd(<span class="name">Image</span>.open('test_jpn_01.jpg')))</span><br></pre></td></tr></table></figure><p>結果の出力。</p><figure class="highlight console"><figcaption><span>出力例</span></figcaption><table><tr><td class="code"><pre><span class="line">Page number: 0</span><br><span class="line">Orientation in degrees: 0</span><br><span class="line">Rotate: 0</span><br><span class="line">Orientation confidence: 7.24</span><br><span class="line">Script: Japanese</span><br><span class="line">Script confidence: 1.83</span><br></pre></td></tr></table></figure><p>この機能に関しては出力形式の変更オプションが役に立ちます。</p><figure class="highlight python"><table><tr><td class="code"><pre><span class="line">print(pytesseract.image_to_osd(Image.open(<span class="string">'test_jpn_01.jpg'</span>), output_type=pytesseract.Output.DICT))</span><br></pre></td></tr></table></figure><p>出力形式は以下のように<code>dict</code>形式になります。</p><figure class="highlight console"><figcaption><span>出力例（dict）</span></figcaption><table><tr><td class="code"><pre><span class="line">&#123;'page_num': 0, 'orientation': 0, 'rotate': 0, 'orientation_conf': 7.24, 'script': 'Japanese', 'script_conf': 1.83&#125;</span><br></pre></td></tr></table></figure><h4><span id="エラーメッセージについて">エラーメッセージについて</span><a href="#エラーメッセージについて" class="header-anchor">#</a></h4><p>画像によっては情報不足で判定できないため、例外が発生する場合があります。</p><figure class="highlight console"><table><tr><td class="code"><pre><span class="line">TesseractError: (1, 'Tesseract Open Source OCR Engine v4.0.0-beta.4-20-ge9b4e with Leptonica Too few characters. Skipping this page Warning. Invalid resolution 0 dpi. Using 70 instead. Too few characters. Skipping this page Error during processing.')</span><br></pre></td></tr></table></figure><p>改行が除去されて見づらいですが<code>Too few characters. Skipping this page</code>というメッセージのとおり、文字数の不足が原因です。</p><h2><span id="補足">補足</span><a href="#補足" class="header-anchor">#</a></h2><p>Pythonの<code>tempfile</code>モジュールで作成した一時ファイルに画像を書き出し、<code>subprocess</code>モジュールで<code>tesseract</code>コマンドを起動しているだけです。</p><p>そのため、認識結果に対してループ処理を行うAPIはありません。</p>]]></content>
    
    <summary type="html">
    
      &lt;p&gt;この記事では&lt;a href=&quot;https://github.com/tesseract-ocr/tesseract&quot; target=&quot;_blank&quot; rel=&quot;noopener&quot;&gt;Tesseact OCR&lt;/a&gt;のPythonラッパー、&lt;a href=&quot;&quot;&gt;&lt;code&gt;pytesseract&lt;/code&gt;&lt;/a&gt;を紹介します。&lt;/p&gt;
    
    </summary>
    
      <category term="IT" scheme="http://blog.machine-powers.net/categories/IT/"/>
    
      <category term="Programming" scheme="http://blog.machine-powers.net/categories/IT/Programming/"/>
    
    
      <category term="OCR" scheme="http://blog.machine-powers.net/tags/OCR/"/>
    
      <category term="python3" scheme="http://blog.machine-powers.net/tags/python3/"/>
    
      <category term="tesseract-ocr" scheme="http://blog.machine-powers.net/tags/tesseract-ocr/"/>
    
      <category term="pytesseract" scheme="http://blog.machine-powers.net/tags/pytesseract/"/>
    
  </entry>
  
  <entry>
    <title>PyOCRでTesseractを使う</title>
    <link href="http://blog.machine-powers.net/2018/08/04/pyocr-and-tips/"/>
    <id>http://blog.machine-powers.net/2018/08/04/pyocr-and-tips/</id>
    <published>2018-08-04T16:03:37.000Z</published>
    <updated>2018-09-30T15:06:38.259Z</updated>
    
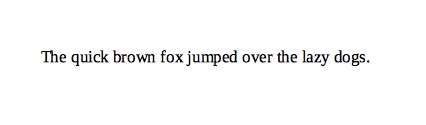
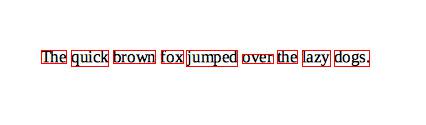
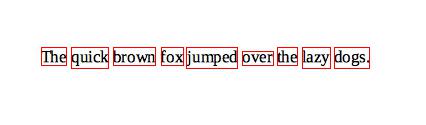
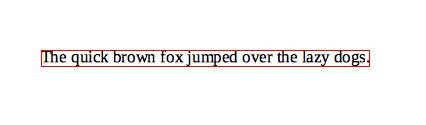
    <content type="html"><![CDATA[<p>Tesseract OCRのPythonバインディング、<a href="https://gitlab.gnome.org/World/OpenPaperwork/pyocr" target="_blank" rel="noopener"><code>pyocr</code></a>のセットアップと使い方を紹介します。</p><p><code>pyocr</code>は現在もメンテナンスされているTesseractのPython用ライブラリ（バインディング）としては最古参です（2012年リリース）。<br><a id="more"></a></p><h2><span id="目次">目次</span><a href="#目次" class="header-anchor">#</a></h2><div class="toc"><!-- toc --><ul><li><a href="#pyocrについて">PyOCRについて</a></li><li><a href="#環境とインストール">環境とインストール</a></li><li><a href="#使い方">使い方</a><ul><li><a href="#利用可能なocr-tool-の確認">利用可能なOCR tool の確認</a></li><li><a href="#利用可能な言語の確認">利用可能な言語の確認</a></li><li><a href="#ocr処理の実行">OCR処理の実行</a></li></ul></li><li><a href="#詳細">詳細</a><ul><li><a href="#builderのオプション">Builderのオプション</a></li><li><a href="#boxbuilder">BoxBuilder</a></li><li><a href="#方向検出">方向検出</a></li><li><a href="#pdf生成">PDF生成</a></li></ul></li><li><a href="#その他">その他</a><ul><li><a href="#hocr出力">hOCR出力</a></li><li><a href="#macos環境での注意">macOS環境での注意</a></li></ul></li></ul><!-- tocstop --></div><h2><span id="pyocrについて">PyOCRについて</span><a href="#pyocrについて" class="header-anchor">#</a></h2><p><code>pyocr</code>はTesseractとCuneiform（ロシア製のOCRエンジンでヨーロッパ系の言語をサポート）の2つに対応しています。</p><p>OpenPaper.workというプロジェクトの一部でライセンスはGPL v3。</p><p>プロジェクトのページ：<a href="https://openpaper.work/en-us/projects" target="_blank" rel="noopener">OpenPaper.work - Open-source</a></p><p>公式リポジトリ：<a href="https://gitlab.gnome.org/World/OpenPaperwork/pyocr" target="_blank" rel="noopener">World / OpenPaperwork / pyocr · GitLab</a></p><p>Tesseractに関してはC言語用のAPIを使う方式と<code>tesseract</code>コマンドを呼び出す方式の2つの方式に対応している点が特徴です。</p><p>なお、この記事ではCuneiformについては日本語に対応していない関係で対象外とします。</p><p><code>tesseract</code>コマンドの呼び出しにはPythonのsubprocessモジュールが使用されます。</p><p>コマンド呼び出し（<code>tesseract</code>）とC言語用API（<code>libtesseract</code>）機能の比較は以下のようになります。</p><table><thead><tr><th style="text-align:center">実行方式</th><th style="text-align:center">文字の認識</th><th style="text-align:center">数字限定</th><th style="text-align:center">文字方向検出</th><th style="text-align:center">PDF出力</th></tr></thead><tbody><tr><td style="text-align:center">コマンド呼び出し（<code>tesseract</code>）</td><td style="text-align:center">Yes</td><td style="text-align:center">Yes (ver. 3.0x)</td><td style="text-align:center">Yes (only ver. 3.0x)</td><td style="text-align:center">No</td></tr><tr><td style="text-align:center">C言語用API（<code>libtesseract</code>）</td><td style="text-align:center">Yes</td><td style="text-align:center">Yes (ver. 3.0x)</td><td style="text-align:center">Yes</td><td style="text-align:center">Yes</td></tr></tbody></table><p>認識対象を数字に限定するオプションが用意されていますがTesseract 4.0系では通常の認識モードと同じ結果になります（理由は後述）。</p><p><code>pyocr</code>の欠点としてはTesseract 4.0系と組み合わせる際に、OCRエンジンのモードを切り替えることができません（<code>--oem</code>オプションに対応していない）。</p><p>またコマンド呼び出し方式で使用する場合は画像データの一時ファイルへの書き出しと、結果をテキストファイルから読み込む処理が入る分、処理に余分に時間がかかります。</p><p>コマンド呼び出し方式での実行時は、<code>tesseract</code>コマンドを<code>psm</code>オプションと<code>config</code>ファイルとして<code>makebox</code>を指定して実行する形式になります。</p><h2><span id="環境とインストール">環境とインストール</span><a href="#環境とインストール" class="header-anchor">#</a></h2><p>この記事ではUbuntu 18.04LTSおよび標準パッケージのTesseract OCR 4.00beta.1を対象としています。</p><ul><li>Ubuntu 18.04 LTS</li><li>Tesseract OCR 4.00beta.1</li><li>Python 3.6.5</li><li>pyocr 0.5.2</li><li>Pillow 5.2.0</li></ul><p>Tesseract本体は<code>apt</code>コマンドでインストールしてあるものとします。</p><figure class="highlight shell"><table><tr><td class="code"><pre><span class="line"><span class="meta">$</span><span class="bash"> pip3 install pyocr</span></span><br></pre></td></tr></table></figure><p>依存ライブラリとして画像処理ライブラリのPillowが必要です。下記のコマンドでインストールします。</p><figure class="highlight shell"><table><tr><td class="code"><pre><span class="line"><span class="meta">$</span><span class="bash"> pip3 install Pillow</span></span><br></pre></td></tr></table></figure><h2><span id="使い方">使い方</span><a href="#使い方" class="header-anchor">#</a></h2><p>テスト画像は以下を使用します。</p><p><img src="/images/tesserocr/sample.jpg" alt="テスト用の画像ファイル（英文）"></p><p>なお、<code>tesseract</code>コマンドの詳細はで解説しているのでそちらも参照して下さい。</p><h3><span id="利用可能なocr-tool-の確認">利用可能なOCR tool の確認</span><a href="#利用可能なocr-tool-の確認" class="header-anchor">#</a></h3><p><code>pyocr</code>では利用可能なOCRエンジンをtoolという名前で抽象化しています。<br>利用可能なツールのリストを<code>get_available_tools()</code>で取得できます。</p><figure class="highlight python"><table><tr><td class="code"><pre><span class="line"><span class="keyword">import</span> pyocr</span><br><span class="line"></span><br><span class="line">tools = pyocr.get_available_tools()</span><br><span class="line"><span class="keyword">for</span> tool <span class="keyword">in</span> tools :</span><br><span class="line">    print(tool.get_name())</span><br></pre></td></tr></table></figure><p>出力は以下のようになります。</p><figure class="highlight console"><table><tr><td class="code"><pre><span class="line">Tesseract (sh)</span><br><span class="line">Tesseract (C-API)</span><br></pre></td></tr></table></figure><h3><span id="利用可能な言語の確認">利用可能な言語の確認</span><a href="#利用可能な言語の確認" class="header-anchor">#</a></h3><figure class="highlight python"><table><tr><td class="code"><pre><span class="line"><span class="keyword">import</span> pyocr</span><br><span class="line"></span><br><span class="line">tools = pyocr.get_available_tools()</span><br><span class="line"></span><br><span class="line">tool = tools[<span class="number">0</span>]</span><br><span class="line">langs = tool.get_available_languages()</span><br><span class="line"></span><br><span class="line">print(langs)</span><br></pre></td></tr></table></figure><p>出力結果の例を示します。</p><figure class="highlight scheme"><table><tr><td class="code"><pre><span class="line">[<span class="symbol">'Japanese</span>', <span class="symbol">'eng</span>', <span class="symbol">'Japanese_vert</span>', <span class="symbol">'Latin</span>', <span class="symbol">'jpn_vert</span>', <span class="symbol">'osd</span>', <span class="symbol">'jpn</span>']</span><br></pre></td></tr></table></figure><h3><span id="ocr処理の実行">OCR処理の実行</span><a href="#ocr処理の実行" class="header-anchor">#</a></h3><p>文字認識処理の実行には<code>image_to_string()</code>メソッドを使用します。</p><p>引数の入力画像はPILのImage、<code>lang</code>に言語を指定します。出力形式の制御は<code>builder</code>オプションで制御できます。</p><p><code>lang</code>を省略した場合のデフォルトはtool依存（ほとんどのケースで<code>eng</code>）。</p><p>また、<code>builder</code>に指定可能なオプションは以下のとおり（省略した場合は<code>TextBuilder</code>。</p><ul><li>TextBuilder : テキスト全体</li><li>WordBoxBuilder : 単語単位（画像内の位置座標付き）</li><li>LineBoxBuilder : 行単位（画像内の位置座標付き）</li><li>DigitBuilder : 数字のみ</li><li>DigitLineBoxBuilder : </li></ul><p>DigitBuilderおよびDigitLineBoxBuilderは認識対象の文字の種類を数字に限定してTesseractを動作させるオプション。ただし、Tesseract 4.0系の新しい認識エンジンでは機能しない。</p><figure class="highlight awk"><table><tr><td class="code"><pre><span class="line">from PIL import Image</span><br><span class="line">import sys</span><br><span class="line"></span><br><span class="line">import pyocr</span><br><span class="line">import pyocr.builders</span><br><span class="line"></span><br><span class="line">tools = pyocr.get_available_tools()</span><br><span class="line"><span class="keyword">if</span> len(tools) == <span class="number">0</span>:</span><br><span class="line">        print(<span class="string">"No OCR tool found"</span>)</span><br><span class="line">        sys.<span class="keyword">exit</span>(<span class="number">1</span>)</span><br><span class="line"><span class="comment"># The tools are returned in the recommended order of usage</span></span><br><span class="line">tool = tools[<span class="number">0</span>]</span><br><span class="line"></span><br><span class="line">lang = <span class="string">'eng'</span></span><br><span class="line">txt = tool.image_to_string(</span><br><span class="line">        Image.open(<span class="string">'images/sample.jpg'</span>),</span><br><span class="line">        lang=lang,</span><br><span class="line">        builder=pyocr.builders.TextBuilder()</span><br><span class="line">        )</span><br><span class="line"></span><br><span class="line">print(txt)</span><br></pre></td></tr></table></figure><p>認識結果は以下のようになります。</p><figure class="highlight console"><figcaption><span>出力</span></figcaption><table><tr><td class="code"><pre><span class="line">The quick brown fox jumped over the lazy dogs.</span><br></pre></td></tr></table></figure><h2><span id="詳細">詳細</span><a href="#詳細" class="header-anchor">#</a></h2><h3><span id="builderのオプション">Builderのオプション</span><a href="#builderのオプション" class="header-anchor">#</a></h3><p><code>pyocr</code>ではTesseractのオプションは<code>builder</code>オブジェクトでコントロールするようです。</p><p>例えば、ページセグメンテーションモードは<code>builder</code>オブジェクトの<code>tesseract_layout</code>オプションで設定します。</p><figure class="highlight stylus"><table><tr><td class="code"><pre><span class="line">txt = tool.image_to_string(</span><br><span class="line">        Image.open(<span class="string">'images/sample.jpg'</span>),</span><br><span class="line">        lang=lang,</span><br><span class="line">        builder=pyocr<span class="selector-class">.builders</span><span class="selector-class">.TextBuilder</span>(tesseract_layout=<span class="number">6</span>))</span><br><span class="line">        )</span><br></pre></td></tr></table></figure><p><code>tesseract_layout</code>のデフォルト値は3です。</p><h3><span id="boxbuilder">BoxBuilder</span><a href="#boxbuilder" class="header-anchor">#</a></h3><p><code>BoxBuilder</code>という名前のついた<code>builder</code>を<code>image_to_string()</code>メソッドのオプションに指定すると、<code>LineBox</code>オブジェクトのリストを返します。このオブジェクトは<code>contents</code>と<code>postion</code>というattributeを持ちます。</p><p>ループ処理することで認識結果と座標（左下原点系）を得ることができます。</p><figure class="highlight python"><table><tr><td class="code"><pre><span class="line"></span><br><span class="line">word_box  = tool.image_to_string( Image.open(<span class="string">'images/sample.jpg'</span>), </span><br><span class="line">    builder=pyocr.builders.WordBoxBuilder())</span><br><span class="line"></span><br><span class="line"><span class="keyword">for</span> box <span class="keyword">in</span> word_box:</span><br><span class="line">    print(<span class="string">"word: &#123;&#125;, pos: &#123;&#125;"</span>.format(box.content, box.position))</span><br></pre></td></tr></table></figure><p>出力例を以下にに示します。</p><figure class="highlight console"><table><tr><td class="code"><pre><span class="line">word: The, pos: ((41, 50), (66, 63))</span><br><span class="line">word: quick, pos: ((71, 50), (108, 66))</span><br><span class="line">word: brown, pos: ((113, 50), (155, 63))</span><br><span class="line">word: fox, pos: ((161, 50), (183, 63))</span><br><span class="line">word: jumped, pos: ((186, 50), (237, 66))</span><br><span class="line">word: over, pos: ((242, 54), (273, 63))</span><br><span class="line">word: the, pos: ((277, 50), (297, 63))</span><br><span class="line">word: lazy, pos: ((302, 50), (330, 66))</span><br><span class="line">word: dogs., pos: ((334, 50), (369, 66))</span><br></pre></td></tr></table></figure><h3><span id="方向検出">方向検出</span><a href="#方向検出" class="header-anchor">#</a></h3><p>Tesseract 4.0系で方向検出機能を使用する場合、<code>tesseract</code>コマンドの出力が変化している。そのため、<code>pyocr</code>との組み合わせでは<code>libtesseract</code>を使う必要がある。</p><figure class="highlight python"><table><tr><td class="code"><pre><span class="line"><span class="keyword">from</span> PIL <span class="keyword">import</span> Image</span><br><span class="line"><span class="keyword">import</span> sys</span><br><span class="line"></span><br><span class="line"><span class="keyword">import</span> pyocr</span><br><span class="line"><span class="keyword">import</span> pyocr.builders</span><br><span class="line"></span><br><span class="line">tools = pyocr.get_available_tools()</span><br><span class="line"></span><br><span class="line">tool = tools[<span class="number">1</span>] <span class="comment"># libtesseractを使う</span></span><br><span class="line"></span><br><span class="line"><span class="keyword">if</span> tool.can_detect_orientation() :</span><br><span class="line">    <span class="keyword">try</span>:</span><br><span class="line">        orientation = tool.detect_orientation(Image.open(<span class="string">'test.png'</span>), lang=<span class="string">'osd'</span>)</span><br><span class="line"></span><br><span class="line">        print(orientation)</span><br><span class="line">    <span class="keyword">except</span> pyocr.PyocrException <span class="keyword">as</span> exc:</span><br><span class="line">        print(<span class="string">"Orientation detection failed: &#123;&#125;"</span>.format(exc))</span><br></pre></td></tr></table></figure><p>出力例は以下のように、角度と確からしさが出力されます。</p><figure class="highlight xquery"><table><tr><td class="code"><pre><span class="line">&#123;<span class="string">'angle'</span>: <span class="number">0</span>, <span class="string">'confidence'</span>: <span class="number">2.7592315673828125</span>&#125;</span><br></pre></td></tr></table></figure><h3><span id="pdf生成">PDF生成</span><a href="#pdf生成" class="header-anchor">#</a></h3><p><code>libtesseract</code>を使用する場合、TesseractのPDF生成機能を利用できます。</p><figure class="highlight python"><table><tr><td class="code"><pre><span class="line"><span class="keyword">from</span> PIL <span class="keyword">import</span> Image</span><br><span class="line"><span class="keyword">import</span> sys</span><br><span class="line"></span><br><span class="line"><span class="keyword">import</span> pyocr</span><br><span class="line"><span class="keyword">import</span> pyocr.builders</span><br><span class="line"></span><br><span class="line">tools = pyocr.get_available_tools()</span><br><span class="line"></span><br><span class="line">tool = tools[<span class="number">1</span>] <span class="comment"># libtesseractを使う</span></span><br><span class="line"></span><br><span class="line">tool.image_to_pdf(Image.open(<span class="string">'test.png'</span>), lang=<span class="string">'jpn'</span> , output_file=<span class="string">'pdf_test'</span>)</span><br></pre></td></tr></table></figure><p>エラーメッセージが表示されますが、PDFの生成は成功します。</p><figure class="highlight subunit"><table><tr><td class="code"><pre><span class="line"><span class="keyword">Error </span>in fopenReadStream: file not found</span><br><span class="line"><span class="keyword">Error </span>in findFileFormat: image file not found</span><br></pre></td></tr></table></figure><p>上記の例の場合、<code>pdf_test.pdf</code>という名前でPDFファイルが作成されます。</p><h2><span id="その他">その他</span><a href="#その他" class="header-anchor">#</a></h2><h3><span id="hocr出力">hOCR出力</span><a href="#hocr出力" class="header-anchor">#</a></h3><p>BoxBuilder系の出力オプションを指定した場合、<code>builder.write_file()</code>メソッドを使うことによりxml（hOCR）形式でファイルに書き出すことができます。</p><p>詳細は公式ドキュメントを参照。</p><p><a href="https://gitlab.gnome.org/World/OpenPaperwork/pyocr#writing-and-reading-hocr-files" target="_blank" rel="noopener">World / OpenPaperwork / pyocr · GitLab</a></p><h3><span id="macos環境での注意">macOS環境での注意</span><a href="#macos環境での注意" class="header-anchor">#</a></h3><p><code>pyocr</code>は*nix環境では<code>libtesseract</code>の共有ライブラリの拡張子が<code>.so</code>であることを期待しています。macOS環境では拡張子が違うので<code>libtesseract</code>を検出しません。<br>対処方法としてはソースをいじるか、<code>libtesseract.dylib</code>に対して<code>libtesseract.so.3</code>または<code>libtesseract.so.4</code>というシンボリックリンクを作成する必要があります。<br>サーバーサイドで使うケースがほとんどだろうと思いますが念の為。</p>]]></content>
    
    <summary type="html">
    
      &lt;p&gt;Tesseract OCRのPythonバインディング、&lt;a href=&quot;https://gitlab.gnome.org/World/OpenPaperwork/pyocr&quot; target=&quot;_blank&quot; rel=&quot;noopener&quot;&gt;&lt;code&gt;pyocr&lt;/code&gt;&lt;/a&gt;のセットアップと使い方を紹介します。&lt;/p&gt;
&lt;p&gt;&lt;code&gt;pyocr&lt;/code&gt;は現在もメンテナンスされているTesseractのPython用ライブラリ（バインディング）としては最古参です（2012年リリース）。&lt;br&gt;
    
    </summary>
    
      <category term="IT" scheme="http://blog.machine-powers.net/categories/IT/"/>
    
      <category term="Software" scheme="http://blog.machine-powers.net/categories/IT/Software/"/>
    
      <category term="OCR" scheme="http://blog.machine-powers.net/categories/IT/Software/OCR/"/>
    
    
      <category term="python3" scheme="http://blog.machine-powers.net/tags/python3/"/>
    
      <category term="tesseract-ocr" scheme="http://blog.machine-powers.net/tags/tesseract-ocr/"/>
    
      <category term="pyocr" scheme="http://blog.machine-powers.net/tags/pyocr/"/>
    
  </entry>
  
  <entry>
    <title>tesseractコマンドの使い方（Tesseract OCR 4.x）</title>
    <link href="http://blog.machine-powers.net/2018/08/02/learning-tesseract-command-utility/"/>
    <id>http://blog.machine-powers.net/2018/08/02/learning-tesseract-command-utility/</id>
    <published>2018-08-02T14:36:26.000Z</published>
    <updated>2018-09-30T15:06:38.259Z</updated>
    
    <content type="html"><![CDATA[<p>オープンソースのOCRエンジン、Tesseract OCR付属の<code>tesseract</code>コマンドについて解説します。<br><a id="more"></a></p><h2><span id="目次">目次</span><a href="#目次" class="header-anchor">#</a></h2><div class="toc"><!-- toc --><ul><li><a href="#tesseract-ocrとは">Tesseract OCRとは</a><ul><li><a href="#前提条件">前提条件</a></li><li><a href="#インストール">インストール</a></li><li><a href="#データファイルについて">データファイルについて</a></li><li><a href="#データファイルの格納先の変更">データファイルの格納先の変更</a></li></ul></li><li><a href="#基本的な使い方">基本的な使い方</a></li><li><a href="#出力形式">出力形式</a></li><li><a href="#オプションの詳細と高度な使い方">オプションの詳細と高度な使い方</a><ul><li><a href="#パラメーターによる挙動の制御">パラメーターによる挙動の制御</a></li><li><a href="#複数言語モード">複数言語モード</a></li><li><a href="#複数ファイルの一括処理">複数ファイルの一括処理</a></li><li><a href="#有効な言語の一覧データファイルのリスト">有効な言語の一覧（データファイルのリスト）</a></li><li><a href="#エンジンモードの切り替え">エンジンモードの切り替え</a></li><li><a href="#ページセグメンテーションモード-psm">ページセグメンテーションモード (PSM)</a></li><li><a href="#方向と言語の判定">方向と言語の判定</a></li></ul></li><li><a href="#情報表示系のオプション">情報表示系のオプション</a><ul><li><a href="#バージョンの表示">バージョンの表示</a></li><li><a href="#モード別詳細">モード別詳細</a></li><li><a href="#ヘルプ表示">ヘルプ表示</a></li></ul></li><li><a href="#その他">その他</a><ul><li><a href="#警告メッセージについて">警告メッセージについて</a></li></ul></li><li><a href="#参考url">参考URL</a></li></ul><!-- tocstop --><p></div></p><h2><span id="tesseract-ocrとは">Tesseract OCRとは</span><a href="#tesseract-ocrとは" class="header-anchor">#</a></h2><p>オープンソースの文字認識（OCR）エンジンです。基本的に文字認識機能を提供するライブラリであって一般の方が想像するようなOCRソフトウェアではありません。</p><p>基本的にユーザー側でプログラムを作成して使うことを想定していますが、コマンドラインのツールとして<code>tesseract</code>コマンドが提供されています。</p><h3><span id="前提条件">前提条件</span><a href="#前提条件" class="header-anchor">#</a></h3><p>最新の安定版はバージョン3.05.02ですが、このバージョンは日本語の認識率に問題があることで知られています。そのため、この記事ではバージョン4.0系のベータ版を対象とします。</p><ul><li>Ubuntu 18.04.1</li><li>Tesseract OCR 4.0.beta.1</li></ul><h3><span id="インストール">インストール</span><a href="#インストール" class="header-anchor">#</a></h3><p>Ubuntu 18.04 LTSを対象にします。コンパイル済みのパッケージが提供されているのでこれを利用します。Tesseract本体と別に認識させたい言語ごとに<code>traineddata</code>という拡張子のデータファイルが必要です。</p><figure class="highlight shell"><table><tr><td class="code"><pre><span class="line"><span class="meta">$</span><span class="bash"> sudo apt install tesseract-ocr</span></span><br></pre></td></tr></table></figure><p>標準では英語用の言語別の辞書データしかインストールされません。例えば日本語の場合は以下のように追加でインストールします。</p><figure class="highlight shell"><table><tr><td class="code"><pre><span class="line"><span class="meta">$</span><span class="bash"> tesseract-ocr-jpn tesseract-ocr-jpn-vert</span></span><br></pre></td></tr></table></figure><p><code>tesseract-ocr-jpn-vert</code>は縦書き用のデータです。</p><h3><span id="データファイルについて">データファイルについて</span><a href="#データファイルについて" class="header-anchor">#</a></h3><p>バージョンごとに対応したファイルを使用する必要があります。</p><p>Ubunt 18.04では<code>/usr/share/tesseract-ocr/4.00/tessdata/</code>に配置されています。</p><p>バージョン4.0向けのデータとしては下記の3種類のリポジトリがあります。</p><ul><li>tessdata: <a href="https://github.com/tesseract-ocr/tessdata" target="_blank" rel="noopener">tesseract-ocr/tessdata</a></li><li>tessdata_fast: <a href="https://github.com/tesseract-ocr/tessdata_fast" target="_blank" rel="noopener">tesseract-ocr/tessdata_fast: Fast integer versions of trained models</a></li><li>tessdata_best: <a href="https://github.com/tesseract-ocr/tessdata_best" target="_blank" rel="noopener">tesseract-ocr/tessdata_best: Best (most accurate) trained LSTM models.</a></li></ul><p>データファイルの詳細については公式リポジトリのWikiサイトにある<a href="https://github.com/tesseract-ocr/tesseract/wiki/Data-Files" target="_blank" rel="noopener">Data Files</a>というページを参照して下さい。</p><p>Ubuntu 18.04のパッケージに含まれているのは<code>tessdata_fast</code>リポジトリにあるファイルです。</p><p>必要に応じてGitHubのリポジトリから入手します。<code>git clone</code>する際は<code>--depth 1</code>をセットすることでダウンロードする容量を削減できます。</p><p>バージョン4.0系から書字系(script)別のデータファイルも提供されるようになっていますがこの記事では詳細は割愛します。</p><p>また、データファイルの入手にはダウンロード用のPythonスクリプトを使用するともできます。</p><p><a href="https://github.com/zdenop/tessdata_downloader" target="_blank" rel="noopener">GitHub - zdenop/tessdata_downloader: Tesseract tessdata downloader from GitHub repositories</a></p><p><a href="https://github.com/tesseract-ocr/tesseract/wiki/Data-Files" target="_blank" rel="noopener">Data Files · tesseract-ocr/tesseract Wiki · GitHub</a></p><h3><span id="データファイルの格納先の変更">データファイルの格納先の変更</span><a href="#データファイルの格納先の変更" class="header-anchor">#</a></h3><p>環境変数<code>TESSDATA_PREFIX</code>、または<code>--tessdata-dir</code>で指定することも可能です。</p><p>注意：バージョン3系では<code>tessdata</code>ディレクトリの親ディレクトリ。一方、バージョン4系では<code>*.traineddata</code>ファイルのあるディレクトリを指定。</p><p>データファイルの格納先ディレクトリには設定ファイルも保存されています。</p><p><code>ls</code>コマンドでデフォルトの格納先ディレクトリを表示してみます。</p><figure class="highlight stylus"><table><tr><td class="code"><pre><span class="line">$ ls /usr/share/tesseract-ocr/<span class="number">4.00</span>/tessdata/</span><br><span class="line">Japanese<span class="selector-class">.traineddata</span>       Latin<span class="selector-class">.traineddata</span>  eng<span class="selector-class">.traineddata</span>  jpn_vert<span class="selector-class">.traineddata</span>  pdf.ttf</span><br><span class="line">Japanese_vert<span class="selector-class">.traineddata</span>  configs            jpn<span class="selector-class">.traineddata</span>  osd<span class="selector-class">.traineddata</span>       tessconfigs</span><br></pre></td></tr></table></figure><p>優先順位は<code>--tessdata-dir</code>オプション、環境変数<code>TESSDATA_PREFIX</code>、デフォルトのディレクトリの順です。</p><p>オプションが指定されるか、環境変数が設定されている場合はデフォルトのディレクトリは参照されません。</p><h2><span id="基本的な使い方">基本的な使い方</span><a href="#基本的な使い方" class="header-anchor">#</a></h2><p>入力画像の形式は<a href="https://github.com/DanBloomberg/leptonica" target="_blank" rel="noopener">Leptonica</a>という画像処理ライブラリが対応している画像形式（JPEG, png, tiff, webp, jepg2000, bmp, pnm, gif）。</p><figure class="highlight accesslog"><table><tr><td class="code"><pre><span class="line">$ tesseract image outputbase <span class="string">[-l lang]</span> <span class="string">[--psm pagesegmode]</span> <span class="string">[--oem ocr engine mode]</span> <span class="string">[configfile...]</span></span><br></pre></td></tr></table></figure><ul><li><code>image</code>: 画像ファイル（もしくは<code>stdin</code>を指定すると標準入力）</li><li><code>outpubtbase</code>: 拡張子を除いた出力ファイル名（または<code>stdout</code>を指定すると標準出力）</li><li><code>-l lang</code>: 各言語のデータファイルの拡張子を除いた部分（例： <code>eng</code>）</li><li><code>--psm</code>: ページセグメンテーションモードを指定する整数</li><li><code>--oem</code>: OCRエンジンのモード（0, 1, 2, 3、デフォルトは3）</li><li><code>configfile</code>: コントロールパラメーターを記載したファイル</li></ul><p><code>-l</code>オプションを省略した場合は<code>eng</code>が使用されます。</p><figure class="highlight console"><figcaption><span>実行例</span></figcaption><table><tr><td class="code"><pre><span class="line"><span class="meta">$</span><span class="bash"> tesseract sample.jpg output -l jpn</span></span><br></pre></td></tr></table></figure><p>上記の例では、<code>sample.jpg</code>ファイルの読み込み、<code>output.txt</code>に認識結果を出力します。</p><p>また、マルチページのTIFFファイルを扱うこともできます。</p><p>※ pnm形式はpbm、pgm、ppmの三種類の総称。</p><h2><span id="出力形式">出力形式</span><a href="#出力形式" class="header-anchor">#</a></h2><p>デフォルトのテキスト形式の他、HTMLをベースにした<code>hOCR</code>、タブ区切りテキスト、PDFで出力可能です。</p><p><code>tesseract</code>コマンドの末尾に各出力形式のconfigファイルの名称を指定します。</p><p>configファイルはデータファイルと同じ場所を参照します。</p><p>実行時のカレントディレクトリに配置した<code>config</code>ファイルを指定することも可能です。</p><h4><span id="テキスト形式">テキスト形式</span><a href="#テキスト形式" class="header-anchor">#</a></h4><figure class="highlight console"><figcaption><span>実行例</span></figcaption><table><tr><td class="code"><pre><span class="line"><span class="meta">$</span><span class="bash"> tesseract sample.jpg output -l jpn txt</span></span><br></pre></td></tr></table></figure><h4><span id="hocr-html">hOCR (HTML)</span><a href="#hocr-html" class="header-anchor">#</a></h4><figure class="highlight console"><figcaption><span>実行例</span></figcaption><table><tr><td class="code"><pre><span class="line"><span class="meta">$</span><span class="bash"> tesseract sample.jpg output -l jpn hocr</span></span><br></pre></td></tr></table></figure><h4><span id="tsvタブ区切りテキスト">TSV（タブ区切りテキスト）</span><a href="#tsvタブ区切りテキスト" class="header-anchor">#</a></h4><figure class="highlight console"><figcaption><span>実行例</span></figcaption><table><tr><td class="code"><pre><span class="line"><span class="meta">$</span><span class="bash"> tesseract sample.jpg output -l jpn tsv</span></span><br></pre></td></tr></table></figure><p>出力は<code>output.tsv</code>。英単語は単語単位、日本語の文字はN-gram区切りになります。</p><p>取得できる情報は以下のとおり。</p><figure class="highlight scss"><table><tr><td class="code"><pre><span class="line">level, page_num, block_num, par_num, line_num, word_num, <span class="attribute">left</span>, <span class="attribute">top</span>, <span class="attribute">width</span>, <span class="attribute">height</span>, conf, text</span><br></pre></td></tr></table></figure><h4><span id="pdf形式">PDF形式</span><a href="#pdf形式" class="header-anchor">#</a></h4><figure class="highlight console"><figcaption><span>実行例</span></figcaption><table><tr><td class="code"><pre><span class="line"><span class="meta">$</span><span class="bash"> tesseract sample.jpg output -l jpn pdf</span></span><br></pre></td></tr></table></figure><p>画像の上に透明なテキストが追加された形式になります。画像は圧縮されてPDFに埋め込まれます。</p><p>画像なしの、透明なテキストのみのPDFを作ることもできます。</p><p>画像の圧縮率を調整したい場合に有用です。</p><figure class="highlight console"><figcaption><span>実行例</span></figcaption><table><tr><td class="code"><pre><span class="line"><span class="meta">$</span><span class="bash"> tesseract sample.jpg output -l jpn  -c textonly_pdf=1 pdf</span></span><br></pre></td></tr></table></figure><p>透明なテキストのみのPDFが生成されます。</p><p>一手間かかりますが、<code>qpdf</code>コマンドなどを使用して画像を埋め込むことで背景画像の画質をコントロールできます。</p><p>参考：<a href="https://github.com/tesseract-ocr/tesseract/issues/660#issuecomment-274213632" target="_blank" rel="noopener"> -c textonly_pdf=1</a></p><h2><span id="オプションの詳細と高度な使い方">オプションの詳細と高度な使い方</span><a href="#オプションの詳細と高度な使い方" class="header-anchor">#</a></h2><h3><span id="パラメーターによる挙動の制御">パラメーターによる挙動の制御</span><a href="#パラメーターによる挙動の制御" class="header-anchor">#</a></h3><p>コントロールパラメーターを<code>-c</code>オプションまたは設定ファイルに記載することで挙動を変更できます。</p><p>設定可能なパラメーターおよびデフォルト値を下記のコマンドで表示できます。</p><figure class="highlight shell"><table><tr><td class="code"><pre><span class="line"><span class="meta">$</span><span class="bash"> tesseract --<span class="built_in">print</span>-parameters</span></span><br></pre></td></tr></table></figure><p>下記のWikiも参照して下さい。</p><p><a href="https://github.com/tesseract-ocr/tesseract/wiki/ControlParams" target="_blank" rel="noopener">ControlParams · tesseract-ocr/tesseract Wiki · GitHub</a></p><p>存在しないパラメーターをセットしようとした場合、下記のようなメッセージが表示されます。処理は続行される点に注意が必要です。</p><figure class="highlight routeros"><table><tr><td class="code"><pre><span class="line">Could <span class="keyword">not</span> <span class="builtin-name">set</span> option: <span class="attribute">include_page_breaks</span>=1</span><br></pre></td></tr></table></figure><p>コロンの右側は指定しようとしたパラメーターによって変化します。</p><h3><span id="複数言語モード">複数言語モード</span><a href="#複数言語モード" class="header-anchor">#</a></h3><p><code>+</code>で区切ることで<code>-l</code>オプションに複数の言語名を指定できます。</p><figure class="highlight livecodeserver"><table><tr><td class="code"><pre><span class="line">$ tesseract test.png  <span class="keyword">stdout</span> -l eng+jpn   <span class="comment">--psm 1</span></span><br></pre></td></tr></table></figure><p>指定する順序で認識結果に影響を与える場合があります。</p><figure class="highlight shell"><table><tr><td class="code"><pre><span class="line"><span class="meta">$</span><span class="bash"> tesseract test.png  stdout -l jpn+eng</span></span><br></pre></td></tr></table></figure><p>日本語主体で英単語を含む場合は<code>jpn+eng</code>の方がベターです。<code>eng</code>を優先すると分かち書きされてしまう点に注意して下さい。</p><h3><span id="複数ファイルの一括処理">複数ファイルの一括処理</span><a href="#複数ファイルの一括処理" class="header-anchor">#</a></h3><p>前述のとおり、画像ファイルのリストを記述したファイルを引数に与えることで一括処理が可能です。出力ファイルは単一のファイルで、ファイルごとの認識結果の区切りに改ページ文字（<code>^L</code>）が挿入されます。</p><p>この挙動を変更するには<code>-c page_separator=</code>オプションを使用します。</p><p>ページ区切りに何も挿入しない場合の例を示します。</p><figure class="highlight shell"><table><tr><td class="code"><pre><span class="line"><span class="meta">$</span><span class="bash"> tesseract -c page_separator=<span class="string">''</span>  image_list.txt output</span></span><br></pre></td></tr></table></figure><p>なお、従来の<code>include_page_breaks</code>というパラメータは廃止されています。</p><h3><span id="有効な言語の一覧データファイルのリスト">有効な言語の一覧（データファイルのリスト）</span><a href="#有効な言語の一覧データファイルのリスト" class="header-anchor">#</a></h3><p><code>--list-langs</code>オプションを指定すると現在使用可能な言語の一覧を表示します。</p><figure class="highlight mipsasm"><table><tr><td class="code"><pre><span class="line">$ tesseract --list-langs</span><br><span class="line">List of available languages (<span class="number">7</span>):</span><br><span class="line"><span class="keyword">Japanese</span></span><br><span class="line"><span class="keyword">eng</span></span><br><span class="line"><span class="keyword">Japanese_vert</span></span><br><span class="line"><span class="keyword">Latin</span></span><br><span class="line"><span class="keyword">jpn_vert</span></span><br><span class="line"><span class="keyword">osd</span></span><br><span class="line"><span class="keyword">jpn</span></span><br></pre></td></tr></table></figure><h3><span id="エンジンモードの切り替え">エンジンモードの切り替え</span><a href="#エンジンモードの切り替え" class="header-anchor">#</a></h3><p>従来の認識エンジン(Legacy engine)に加え、LSTMベースのニューラルネットワークによる認識エンジン(LSTM engine)が採用されています。</p><p>ただし、従来の認識エンジンを使用するには古い形式の各言語別のデータを含んだデータファイルが必要になります。つまり、<code>tessdata</code>リポジトリのデータファイルを用意する必要があります。</p><p>従来の認識エンジンを使用する場合は<code>--oem 0</code>、新しい認識エンジンは<code>--oem 1</code>です。両方を組み合わせる場合は<code>--oem 2</code>。  </p><p>指定しない場合はデータファイルに合わせて利用可能なエンジンが使用されます（<code>--oem 3</code>、実際は新しい認識が優先）。</p><p>以下、ヘルプメッセージからの抜粋。</p><ul><li>0    Legacy エンジンのみ</li><li>1    Neural nets LSTM エンジンのみ</li><li>2    Legacy + LSTM の両方を使用</li><li>3    Default, 利用可能なエンジンを使用</li></ul><h3><span id="ページセグメンテーションモード-psm">ページセグメンテーションモード (PSM)</span><a href="#ページセグメンテーションモード-psm" class="header-anchor">#</a></h3><p>画像のレイアウト解析のためのオプションです。<br>ページセグメンテーションモード（PSM）を整数で指定することによりレイアウト解析処理の挙動をコントロールできます。</p><p>バージョン3.05以降では<code>--psm</code>のようにハイフンが2つ必要です。</p><p><code>--psm</code>オプションは以下のように指定します。  </p><figure class="highlight livecodeserver"><table><tr><td class="code"><pre><span class="line">$ tesseract sample.png <span class="keyword">stdout</span> -l jpn <span class="comment">--psm 6</span></span><br></pre></td></tr></table></figure><p>指定可能なオプションのリストです。</p><ul><li>0    文字方向および書字系の検出 (Orientation and script detection: OSD) のみ</li><li>1    自動ページセグメンテーション（OSDありでOCR）.</li><li>2    自動ページセグメンテーション（OSDなし）</li><li>3    完全自動ページセグメンテーション（OSDなし） (Default)</li><li>4    単一カラムの様々なサイズのテキストとみなす</li><li>5    垂直方向に整列した単一カラムの均一ブロックテキストとみなす</li><li>6    単一カラムの均一ブロックテキストとみなす</li><li>7    画像を単一行のテキストとして扱う</li><li>8    画像を単語1つのみ含まれるものとして扱う</li><li>9    画像を円で囲まれた単語1つのみを含むものとして扱う</li><li>10   画像を1文字のだけが含まれるものとして扱う</li><li>11    Sparse text: 不特定の順序でできるだけ多くのテキストを探す</li><li>12    Sparse text: OSDあり</li><li>13    Raw line: 内部の処理をバイパスしつつ画像内にテキストが1行だけあるものとして扱う</li></ul><p><code>--psm 0</code>および<code>--psm 2</code>ではOCR処理は実行されません。</p><p>認識対象の画像によりますが、<code>--psm 6</code>や<code>--psm 4</code>を指定することで認識結果が改善する場合があります。</p><p>特に画像内に含まれるテキストが1行のみの場合、<code>--psm 7</code>が有効です。</p><h3><span id="方向と言語の判定">方向と言語の判定</span><a href="#方向と言語の判定" class="header-anchor">#</a></h3><p>OSDモードの使用例です。文字の方向やページの回転、書字系（書字体系や用字系とも）の情報を表示します。</p><figure class="highlight routeros"><table><tr><td class="code"><pre><span class="line">$ tesseract test.png stdout -l osd --psm 0</span><br><span class="line">Warning. Invalid resolution 0 dpi. Using 70 instead.</span><br><span class="line">Estimating resolution as 189</span><br><span class="line">Page number: 0</span><br><span class="line">Orientation <span class="keyword">in</span> degrees: 0</span><br><span class="line">Rotate: 0</span><br><span class="line">Orientation confidence: 2.76</span><br><span class="line">Script: Japanese</span><br><span class="line">Script confidence: 1.10</span><br></pre></td></tr></table></figure><p><code>osd.traineddata</code>というデータファイルが必要です。また、Tesseract 4.0系ではOSD処理は旧式のエンジンで処理されています。</p><h2><span id="情報表示系のオプション">情報表示系のオプション</span><a href="#情報表示系のオプション" class="header-anchor">#</a></h2><p>以下、バージョン情報などの表示オプションを紹介します。</p><h3><span id="バージョンの表示">バージョンの表示</span><a href="#バージョンの表示" class="header-anchor">#</a></h3><figure class="highlight x86asm"><table><tr><td class="code"><pre><span class="line">$ tesseract --version</span><br><span class="line">tesseract <span class="number">4.0</span><span class="meta">.0</span>-beta<span class="meta">.1</span></span><br><span class="line"> leptonica-<span class="number">1.75</span><span class="meta">.3</span></span><br><span class="line">  libgif <span class="number">5.1</span><span class="meta">.4</span> : libjpeg <span class="number">8d</span> (libjpeg-turbo <span class="number">1.5</span><span class="meta">.2</span>) : libpng <span class="number">1.6</span><span class="meta">.34</span> : libtiff <span class="number">4.0</span><span class="meta">.9</span> : zlib <span class="number">1.2</span><span class="meta">.11</span> : libwebp <span class="number">0.6</span><span class="meta">.1</span> : libopenjp2 <span class="number">2.3</span><span class="meta">.0</span></span><br><span class="line"></span><br><span class="line"> Found AVX</span><br><span class="line"> Found SSE</span><br></pre></td></tr></table></figure><p>省略形は<code>-v</code>です。</p><h3><span id="モード別詳細">モード別詳細</span><a href="#モード別詳細" class="header-anchor">#</a></h3><p>OCRエンジンモードの一覧表示。</p><figure class="highlight vim"><table><tr><td class="code"><pre><span class="line">$ tesseract --<span class="keyword">help</span>-oem</span><br><span class="line">OCR Engine <span class="keyword">mode</span><span class="variable">s:</span> (see http<span class="variable">s:</span>//github.<span class="keyword">com</span>/tesseract-ocr/tesseract/wiki#linux)</span><br><span class="line">  <span class="number">0</span>    Legacy engine <span class="keyword">only</span>.</span><br><span class="line">  <span class="number">1</span>    Neural nets LSTM engine <span class="keyword">only</span>.</span><br><span class="line">  <span class="number">2</span>    Legacy + LSTM engines.</span><br><span class="line">  <span class="number">3</span>    Default, based <span class="keyword">on</span> what <span class="keyword">is</span> available.</span><br></pre></td></tr></table></figure><p>ページセグメンテーションモードの一覧表示。</p><figure class="highlight routeros"><table><tr><td class="code"><pre><span class="line">$ tesseract --help-psm</span><br><span class="line">Page segmentation modes:</span><br><span class="line">  0    Orientation <span class="keyword">and</span><span class="built_in"> script </span>detection (OSD) only.</span><br><span class="line">  1    Automatic<span class="built_in"> page </span>segmentation with OSD.</span><br><span class="line">  2    Automatic<span class="built_in"> page </span>segmentation, but <span class="literal">no</span> OSD, <span class="keyword">or</span> OCR.</span><br><span class="line">  3    Fully automatic<span class="built_in"> page </span>segmentation, but <span class="literal">no</span> OSD. (Default)</span><br><span class="line">  4    Assume a single column of text of variable sizes.</span><br><span class="line">  5    Assume a single uniform block of vertically aligned text.</span><br><span class="line">  6    Assume a single uniform block of text.</span><br><span class="line">  7    Treat the image as a single text line.</span><br><span class="line">  8    Treat the image as a single word.</span><br><span class="line">  9    Treat the image as a single word <span class="keyword">in</span> a circle.</span><br><span class="line"> 10    Treat the image as a single character.</span><br><span class="line"> 11    Sparse text. <span class="builtin-name">Find</span> as much text as possible <span class="keyword">in</span> <span class="literal">no</span> particular order.</span><br><span class="line"> 12    Sparse text with OSD.</span><br><span class="line"> 13   <span class="built_in"> Raw </span>line. Treat the image as a single text line,</span><br><span class="line">       bypassing hacks that are Tesseract-specific.</span><br></pre></td></tr></table></figure><h3><span id="ヘルプ表示">ヘルプ表示</span><a href="#ヘルプ表示" class="header-anchor">#</a></h3><p>下記のコマンドでヘルプメッセージを表示します。</p><figure class="highlight shell"><table><tr><td class="code"><pre><span class="line"><span class="meta">$</span><span class="bash"> tesseract --<span class="built_in">help</span></span></span><br></pre></td></tr></table></figure><p>より詳細なヘルプメッセージの表示。</p><figure class="highlight shell"><table><tr><td class="code"><pre><span class="line"><span class="meta">$</span><span class="bash"> tesseract --<span class="built_in">help</span>-extra</span></span><br></pre></td></tr></table></figure><h2><span id="その他">その他</span><a href="#その他" class="header-anchor">#</a></h2><h3><span id="警告メッセージについて">警告メッセージについて</span><a href="#警告メッセージについて" class="header-anchor">#</a></h3><p><code>tesseract</code>コマンドの実行時に、下記のメッセージが表示されますが、これは内部で使用している画像処理ライブラリ（Leptonica）の警告メッセージで無視して問題ないです。</p><figure class="highlight lsl"><table><tr><td class="code"><pre><span class="line">Warning. Invalid resolution <span class="number">0</span> dpi. Using <span class="number">70</span> instead.</span><br></pre></td></tr></table></figure><p><a href="https://github.com/tesseract-ocr/tesseract/issues/649" target="_blank" rel="noopener">[Clarification request/bug?] “Warning. Invalid resolution 0 dpi. Using 70 instead.” · Issue #649 · tesseract-ocr/tesseract</a></p><h2><span id="参考url">参考URL</span><a href="#参考url" class="header-anchor">#</a></h2><ul><li><a href="https://github.com/tesseract-ocr/tesseract/wiki/Command-Line-Usage" target="_blank" rel="noopener">Command Line Usage · tesseract-ocr/tesseract Wiki · GitHub</a></li><li><a href="https://github.com/tesseract-ocr/tesseract/wiki" target="_blank" rel="noopener">Home · tesseract-ocr/tesseract Wiki · GitHub</a></li><li><a href="https://github.com/tesseract-ocr/tesseract/blob/master/doc/tesseract.1.asc" target="_blank" rel="noopener">tesseract/tesseract.1.asc at master · tesseract-ocr/tesseract</a></li></ul>]]></content>
    
    <summary type="html">
    
      &lt;p&gt;オープンソースのOCRエンジン、Tesseract OCR付属の&lt;code&gt;tesseract&lt;/code&gt;コマンドについて解説します。&lt;br&gt;
    
    </summary>
    
      <category term="IT" scheme="http://blog.machine-powers.net/categories/IT/"/>
    
      <category term="Software" scheme="http://blog.machine-powers.net/categories/IT/Software/"/>
    
    
      <category term="OCR" scheme="http://blog.machine-powers.net/tags/OCR/"/>
    
      <category term="tesseract-ocr" scheme="http://blog.machine-powers.net/tags/tesseract-ocr/"/>
    
  </entry>
  
  <entry>
    <title>Python用のOCRライブラリ、tesserocr その2</title>
    <link href="http://blog.machine-powers.net/2018/07/26/use-tesserocr/"/>
    <id>http://blog.machine-powers.net/2018/07/26/use-tesserocr/</id>
    <published>2018-07-26T10:01:22.000Z</published>
    <updated>2018-09-30T15:06:38.259Z</updated>
    
    <content type="html"><![CDATA[<p>Tesseract OCRのPythonバインディング、<a href="https://github.com/sirfz/tesserocr" target="_blank" rel="noopener">tesserocr</a>の使い方に関して。</p><p>この記事では<a href="/2018/07/12/install-tesserocr/" title="過去記事">過去記事</a>で紹介しなかった、より高度な使用方法を紹介します。<br><a id="more"></a></p><h2><span id="目次">目次</span><a href="#目次" class="header-anchor">#</a></h2><div class="toc"><!-- toc --><ul><li><a href="#環境">環境</a></li><li><a href="#テスト用の画像">テスト用の画像</a></li><li><a href="#pytessbaseapi">PyTessBaseAPI</a><ul><li><a href="#複数ファイルの一括処理">複数ファイルの一括処理</a></li><li><a href="#イテレータの使用">イテレータの使用</a></li><li><a href="#osd">OSD</a></li></ul></li><li><a href="#まとめ">まとめ</a></li><li><a href="#参考">参考</a></li></ul><!-- tocstop --></div><h2><span id="環境">環境</span><a href="#環境" class="header-anchor">#</a></h2><ul><li>Ubuntu 18.04 LTS</li><li>Python 3.6.5</li><li>tesserocr 2.3.0</li></ul><p>使用している<code>tesseract</code>のバージョンは、<code>tesseract 4.0.0-beta.1</code>です。</p><p>github上で公開されている開発版では初期化に失敗する可能性があります。</p><p>詳細なインストール方法は<a href="/2018/07/12/install-tesserocr/" title="過去記事">過去記事</a>を参照のこと。</p><h2><span id="テスト用の画像">テスト用の画像</span><a href="#テスト用の画像" class="header-anchor">#</a></h2><p>画像ファイルは以下のファイルを使用しています。</p><p><img src="/images/tesserocr/sample.jpg" alt="テスト用の画像ファイル（英文）"></p><p><img src="/images/tesserocr/test_jpn_01.jpg" alt="テスト用の画像ファイル（その1）"></p><p><img src="/images/tesserocr/test_jpn_02.jpg" alt="テスト用の画像ファイル（その2）"></p><p><img src="/images/tesserocr/test_jpn_03.jpg" alt="テスト用の画像ファイル（その3）"></p><h2><span id="pytessbaseapi">PyTessBaseAPI</span><a href="#pytessbaseapi" class="header-anchor">#</a></h2><p><code>PyTessBaseAPI</code>オブジェクトを初期化して使用します。基本的にTesseractのAPIと一対一対応した形式になります。</p><h3><span id="複数ファイルの一括処理">複数ファイルの一括処理</span><a href="#複数ファイルの一括処理" class="header-anchor">#</a></h3><figure class="highlight python"><table><tr><td class="code"><pre><span class="line"><span class="keyword">from</span> tesserocr <span class="keyword">import</span> PyTessBaseAPI</span><br><span class="line"></span><br><span class="line">images = [<span class="string">'test_jpn_01.jpg'</span>, <span class="string">'test_jpn_02.jpg'</span>, <span class="string">'test_jpn_03.jpg'</span>]</span><br><span class="line"></span><br><span class="line"><span class="keyword">with</span> PyTessBaseAPI(lang=<span class="string">'jpn'</span>, psm=<span class="number">1</span>) <span class="keyword">as</span> api:</span><br><span class="line">    <span class="keyword">for</span> img <span class="keyword">in</span> images:</span><br><span class="line">        api.SetImageFile(img)</span><br><span class="line">        print(api.GetUTF8Text())</span><br></pre></td></tr></table></figure><p><code>SetImageFile()</code>の代わりに<code>SetImage()</code>メソッドを使用することでPillowやOpenCVなどの画像処理ライブラリと連携させることが可能です。</p><p>出力は以下に示しています。認識結果は良好。</p><figure class="highlight plain"><table><tr><td class="code"><pre><span class="line">日本語の文章は、漢字、カタカナ、ひらがなだけでなく、アルファベットや</span><br><span class="line">アラビア数字などの文字によって構成されています。</span><br><span class="line"></span><br><span class="line">明朝体やゴシック体、教科書体、さらには丸ゴシック体などの書体を使い分けます。</span><br><span class="line"></span><br><span class="line">オープンソースの文字認識エンジン、Tesseract OCR ですが、これまでは日本語の</span><br><span class="line">認議率に問題があることで有名でした。ですが、それは過去の話。</span><br><span class="line"></span><br><span class="line">新しいパージョンでは LSTM ペースのニューラルネットワークを採用した新しい認識エンジンが採用</span><br><span class="line">きれています。認識率が大幅に向上しており、特に英単語などの半角英数字を含む場合で顕著です。</span><br><span class="line"></span><br><span class="line"></span><br><span class="line"></span><br><span class="line">OCR 機能を提供する Web API はいくつか存在しますが、用途によってカスタマイズすることが</span><br><span class="line">できません。Tesseract は多数の言語に対応し、Linux、macOS、Windows で動作します。</span><br></pre></td></tr></table></figure><p><code>PyTessBaseAPI</code>の初期化オプションは省略可能です。<br>その場合はデフォルトの言語である英語の言語別の辞書データが読み込まれ、ページセグメンテーションモードは自動判別となります。</p><p><code>PyTessBaseAPI</code>の初期化オプションのリストを示します。</p><ul><li>path: tessdataディレクトリの親ディレクトリのパス（最後の文字が<code>/</code>となっていなければならない）</li><li>lang: 言語名（<code>tessdata</code>ファイルの拡張子を除いた部分）を指定する</li><li>psm: ページセグメンテーションモード（0 - 13）</li><li>init: <code>init</code>メソッドを呼び出すか（もしFalseをセットした場合、初期化処理の完了後に<code>init</code>メソッドを呼び出す必要あり）</li><li>oem: OCRエンジンモードを指定（0, 1, 2, 3）</li></ul><p>ページセグメンテーションモード、OCRエンジンのモードは<code>tesseract</code>コマンドのオプションと同様です。<br>ページセグメンテーションモードの詳細ついては<a href="https://github.com/tesseract-ocr/tesseract/wiki/ImproveQuality#page-segmentation-method" target="_blank" rel="noopener">Wikiページ</a>または<code>tesseract</code>コマンドのヘルプメッセージを参照のこと。</p><p>ページセグメンテーションモードは整数で指定できますが、<code>PSM</code>モジュールをインポートすることで定義済みの定数を使用できます。</p><figure class="highlight python"><table><tr><td class="code"><pre><span class="line"><span class="keyword">from</span> tesserocr <span class="keyword">import</span> PSM</span><br></pre></td></tr></table></figure><p>OCRエンジンモードのデフォルトは<code>3</code>でコンパイル時に指定されたエンジンです（通常は新しいLSTMベースの認識エンジン）。<br>従来の認識エンジンは<code>0</code>、新しい認識エンジンは<code>1</code>、両方を組み合わせ場合は<code>2</code>です。ただし、モード<code>0</code>および<code>2</code>を使用するには従来の認識エンジン用のファイルを含んだ<code>traineddata</code>ファイルを用意する必要があります。</p><p>同様にOCRエンジンモードについても<code>OEM</code>モジュールをインポートすることで定義済みの定数を使用できます。</p><figure class="highlight python"><table><tr><td class="code"><pre><span class="line"><span class="keyword">from</span> tesserocr <span class="keyword">import</span> OEM</span><br></pre></td></tr></table></figure><h3><span id="イテレータの使用">イテレータの使用</span><a href="#イテレータの使用" class="header-anchor">#</a></h3><p><code>GetComponentImages</code>を使用することで、行や単語単位での認識結果の取り出しが可能です。</p><p><code>RIL</code>モジュールをインポートすることで定数として指定できます。</p><figure class="highlight python"><table><tr><td class="code"><pre><span class="line"><span class="keyword">from</span> tesserocr <span class="keyword">import</span> RIL</span><br></pre></td></tr></table></figure><ul><li>ブロック（RIL.BLOCK）</li><li>段落（RIL.PARA）</li><li>行（RIL.TEXTLINE）</li><li>単語（RIL.WORD）</li><li>文字（RIL.SYMBOL）</li></ul><p>なお、RILはResult Itelator Levelの略です。</p><p>認識結果が思わしくない場合、<code>PyTessBaseAPI</code>オブジェクトの初期化オプションを画像と<code>RIL</code>の値に応じて変更して下さい。</p><p>文字を検出した領域の位置を取得できるので、Pillowという画像処理ライブラリをつかって矩形を描画してみます。</p><figure class="highlight python"><table><tr><td class="code"><pre><span class="line"><span class="keyword">from</span> tesserocr <span class="keyword">import</span> PyTessBaseAPI</span><br><span class="line"><span class="keyword">from</span> PIL <span class="keyword">import</span> Image, ImageDraw</span><br><span class="line"></span><br><span class="line">image = Image.open(<span class="string">'./sample.jpg'</span>)</span><br><span class="line"></span><br><span class="line">draw = ImageDraw.Draw(image)</span><br><span class="line"></span><br><span class="line"></span><br><span class="line"><span class="keyword">with</span> PyTessBaseAPI(lang=<span class="string">'eng'</span>, psm=PSM.) <span class="keyword">as</span> api:</span><br><span class="line">    api.SetImage(image)</span><br><span class="line">    boxes = api.GetComponentImages(RIL.WORD, <span class="keyword">True</span>)</span><br><span class="line">    print(<span class="string">'Found &#123;&#125; word image components.'</span>.format(len(boxes)))</span><br><span class="line">    <span class="keyword">for</span> i, (im, box, _, _) <span class="keyword">in</span> enumerate(boxes):</span><br><span class="line">        <span class="comment"># im is a PIL image object</span></span><br><span class="line">        <span class="comment"># box is a dict with x, y, w and h keys</span></span><br><span class="line">        api.SetRectangle(box[<span class="string">'x'</span>], box[<span class="string">'y'</span>], box[<span class="string">'w'</span>], box[<span class="string">'h'</span>])</span><br><span class="line">        ocrResult = api.GetUTF8Text()</span><br><span class="line">        conf = api.MeanTextConf()</span><br><span class="line">        print( (<span class="string">u"Box[&#123;0&#125;]: x=&#123;x&#125;, y=&#123;y&#125;, w=&#123;w&#125;, h=&#123;h&#125;, confidence: &#123;1&#125;, text: &#123;2&#125;"</span>).format(i, conf, ocrResult, **box))</span><br><span class="line">        </span><br><span class="line">        draw.rectangle([box[<span class="string">'x'</span>], box[<span class="string">'y'</span>], box[<span class="string">'x'</span>]+box[<span class="string">'w'</span>], box[<span class="string">'y'</span>]+box[<span class="string">'h'</span>]],outline=(<span class="number">255</span>, <span class="number">0</span>, <span class="number">0</span>))</span><br><span class="line"></span><br><span class="line">image.save(<span class="string">"sample_box.jpg"</span>)</span><br></pre></td></tr></table></figure><p>出力は以下のようになります。</p><figure class="highlight routeros"><table><tr><td class="code"><pre><span class="line">Found 9 word image components.</span><br><span class="line">Box[0]: <span class="attribute">x</span>=41, <span class="attribute">y</span>=50, <span class="attribute">w</span>=25, <span class="attribute">h</span>=13, confidence: 96, text: The</span><br><span class="line"></span><br><span class="line">Box[1]: <span class="attribute">x</span>=71, <span class="attribute">y</span>=50, <span class="attribute">w</span>=37, <span class="attribute">h</span>=16, confidence: 96, text: quick</span><br><span class="line"></span><br><span class="line">Box[2]: <span class="attribute">x</span>=113, <span class="attribute">y</span>=50, <span class="attribute">w</span>=42, <span class="attribute">h</span>=13, confidence: 89, text: brown</span><br><span class="line"></span><br><span class="line">Box[3]: <span class="attribute">x</span>=161, <span class="attribute">y</span>=50, <span class="attribute">w</span>=22, <span class="attribute">h</span>=13, confidence: 86, text: fox</span><br><span class="line"></span><br><span class="line">Box[4]: <span class="attribute">x</span>=186, <span class="attribute">y</span>=50, <span class="attribute">w</span>=51, <span class="attribute">h</span>=16, confidence: 95, text: jumped</span><br><span class="line"></span><br><span class="line">Box[5]: <span class="attribute">x</span>=242, <span class="attribute">y</span>=54, <span class="attribute">w</span>=31, <span class="attribute">h</span>=9, confidence: 0, text: OVeT</span><br><span class="line"></span><br><span class="line">Box[6]: <span class="attribute">x</span>=277, <span class="attribute">y</span>=50, <span class="attribute">w</span>=20, <span class="attribute">h</span>=13, confidence: 96, text: the</span><br><span class="line"></span><br><span class="line">Box[7]: <span class="attribute">x</span>=302, <span class="attribute">y</span>=50, <span class="attribute">w</span>=28, <span class="attribute">h</span>=16, confidence: 95, text: lazy</span><br><span class="line"></span><br><span class="line">Box[8]: <span class="attribute">x</span>=334, <span class="attribute">y</span>=50, <span class="attribute">w</span>=35, <span class="attribute">h</span>=16, confidence: 94, text: dogs.</span><br></pre></td></tr></table></figure><p><img src="/images/tesserocr/sample_box.jpg" alt="文字を認識した位置のボックス（単語単位:RIL.WORD）"></p><p>上記の場合、”over”という単語の認識に失敗しています。<br>Tesseract 4.xは余白にシビアなため、これはボックスの値を調整することで解決します。<br><code>api.SetRectangle()</code>の直前の位置で認識対象のボックスのy軸方向のサイズを調整するだけです。</p><p>Pillow、Tesseractともに座標系は左上が原点となります。したがって、<code>box[&#39;y&#39;]</code>の値を減少させると認識対象の領域が上方へ移動し、<code>box[&#39;h&#39;]</code>の値を増加させると下方に認識対象の領域が下方に伸長します。</p><figure class="highlight python"><figcaption><span>修正前</span></figcaption><table><tr><td class="code"><pre><span class="line">api.SetRectangle(box[<span class="string">'x'</span>], box[<span class="string">'y'</span>], box[<span class="string">'w'</span>], box[<span class="string">'h'</span>])</span><br></pre></td></tr></table></figure><figure class="highlight python"><figcaption><span>修正後</span></figcaption><table><tr><td class="code"><pre><span class="line">box[<span class="string">'y'</span>] -= <span class="number">1</span></span><br><span class="line">box[<span class="string">'h'</span>] += <span class="number">1</span></span><br><span class="line">api.SetRectangle(box[<span class="string">'x'</span>], box[<span class="string">'y'</span>], box[<span class="string">'w'</span>], box[<span class="string">'h'</span>])</span><br></pre></td></tr></table></figure><p><img src="/images/tesserocr/sample_box2.jpg" alt="文字を認識した位置のボックス その2（単語単位:RIL.WORD）"></p><p>なお、行単位（RIL.TEXTLINE）で認識させた場合は問題なく認識します。</p><p><img src="/images/tesserocr/sample_box_line.jpg" alt="文字を認識した位置のボックス（行単位:RIL.TEXTLINE）"></p><figure class="highlight plain"><table><tr><td class="code"><pre><span class="line">Found 1 word image components.</span><br><span class="line">Box[0]: x=41, y=50, w=328, h=16, confidence: 95, text: The quick brown fox jumped over the lazy dogs.</span><br></pre></td></tr></table></figure><h3><span id="osd">OSD</span><a href="#osd" class="header-anchor">#</a></h3><p>まず注意点。OSD（方向と文字種の判別）機能を利用する場合は<code>osd.traineddata</code>ファイルが必要。また、言語も<code>osd</code>指定する必要がある。</p><p>2018年7月現在、提供されている<code>osd.traineddata</code>ファイルは従来式の認識エンジン用のみ。したがってOCRエンジンモードもOEM.</p><h4><span id="detectos">DetectOS()</span><a href="#detectos" class="header-anchor">#</a></h4><p>Tesseractのバージョン3.0x系互換。<code>DetectOS()</code>を使用する方式。</p><figure class="highlight python"><table><tr><td class="code"><pre><span class="line"><span class="keyword">from</span> tesserocr <span class="keyword">import</span> PyTessBaseAPI, PSM</span><br><span class="line"></span><br><span class="line"><span class="keyword">with</span> PyTessBaseAPI(psm=PSM.OSD_ONLY, lang=<span class="string">"osd"</span>) <span class="keyword">as</span> api:</span><br><span class="line">    api.SetImageFile(<span class="string">"./test_jpn_01.jpg"</span>)</span><br><span class="line">    </span><br><span class="line">    os = api.DetectOS()</span><br><span class="line">    print(os)</span><br><span class="line">    </span><br><span class="line">    print(<span class="string">"Orientation: &#123;orientation&#125;\nOrientation confidence: &#123;oconfidence&#125;\nScript: &#123;script&#125;\nScript confidence: &#123;sconfidence&#125;"</span>.format(**os))</span><br></pre></td></tr></table></figure><figure class="highlight plain"><figcaption><span>output</span></figcaption><table><tr><td class="code"><pre><span class="line">&#123;&apos;orientation&apos;: 0, &apos;oconfidence&apos;: 6.647193908691406, &apos;script&apos;: 18, &apos;sconfidence&apos;: 1.692307710647583&#125;</span><br><span class="line">Orientation: 0</span><br><span class="line">Orientation confidence: 6.647193908691406</span><br><span class="line">Script: 18</span><br><span class="line">Script confidence: 1.692307710647583</span><br></pre></td></tr></table></figure><h4><span id="detectorientationscript">DetectOrientationScript()</span><a href="#detectorientationscript" class="header-anchor">#</a></h4><p>Tesseractのバージョン4以降では<code>DetectOrientationScript()</code>メソッドを使用することでよりわかりやすい形式で出力を得ることができます。</p><figure class="highlight python"><table><tr><td class="code"><pre><span class="line"><span class="keyword">from</span> tesserocr <span class="keyword">import</span> PyTessBaseAPI, PSM, OEM</span><br><span class="line"></span><br><span class="line"><span class="keyword">with</span> PyTessBaseAPI(psm=PSM.OSD_ONLY, lang=<span class="string">"osd"</span>) <span class="keyword">as</span> api:</span><br><span class="line">    api.SetImageFile(<span class="string">"./test_jpn_01.jpg"</span>)</span><br><span class="line">    </span><br><span class="line">    os = api.DetectOrientationScript()</span><br><span class="line">    print(os)</span><br><span class="line">    </span><br><span class="line">    print(<span class="string">"Orientation: &#123;orient_deg&#125;\nOrientation confidence: &#123;orient_conf&#125;\nScript: &#123;script_name&#125;\nScript confidence: &#123;script_conf&#125;"</span>.format(**os))</span><br></pre></td></tr></table></figure><p>出力は以下のような人間に優しい形式になります。</p><figure class="highlight console"><figcaption><span>output</span></figcaption><table><tr><td class="code"><pre><span class="line">&#123;'orient_deg': 0, 'orient_conf': 6.647193908691406, 'script_name': 'Japanese', 'script_conf': 1.692307710647583&#125;</span><br><span class="line">Orientation: 0</span><br><span class="line">Orientation confidence: 6.647193908691406</span><br><span class="line">Script: Japanese</span><br><span class="line">Script confidence: 1.692307710647583</span><br></pre></td></tr></table></figure><h2><span id="まとめ">まとめ</span><a href="#まとめ" class="header-anchor">#</a></h2><p>tesserocrはTesseractのC++ APIにほぼ対応しているので本家の<a href="https://github.com/tesseract-ocr/tesseract/wiki/APIExample" target="_blank" rel="noopener">Wikiのドキュメント</a>も参考になります。</p><p>hOCRおよびPDF形式で出力するAPIには対応していませんが、他の言語のTesseract OCRのライブラリにできることはほぼ全て対応しています。</p><h2><span id="参考">参考</span><a href="#参考" class="header-anchor">#</a></h2><ul><li><a href="https://github.com/sirfz/tesserocr#tesserocr" target="_blank" rel="noopener">sirfz/tesserocr: A Python wrapper for the tesseract-ocr API</a></li><li><a href="https://github.com/tesseract-ocr/tesseract/wiki/APIExample" target="_blank" rel="noopener">APIExample · tesseract-ocr/tesseract Wiki · GitHub</a></li></ul>]]></content>
    
    <summary type="html">
    
      &lt;p&gt;Tesseract OCRのPythonバインディング、&lt;a href=&quot;https://github.com/sirfz/tesserocr&quot; target=&quot;_blank&quot; rel=&quot;noopener&quot;&gt;tesserocr&lt;/a&gt;の使い方に関して。&lt;/p&gt;
&lt;p&gt;この記事では&lt;a href=&quot;/2018/07/12/install-tesserocr/&quot; title=&quot;過去記事&quot;&gt;過去記事&lt;/a&gt;で紹介しなかった、より高度な使用方法を紹介します。&lt;br&gt;
    
    </summary>
    
      <category term="IT" scheme="http://blog.machine-powers.net/categories/IT/"/>
    
      <category term="Programming" scheme="http://blog.machine-powers.net/categories/IT/Programming/"/>
    
    
      <category term="OCR" scheme="http://blog.machine-powers.net/tags/OCR/"/>
    
      <category term="python3" scheme="http://blog.machine-powers.net/tags/python3/"/>
    
      <category term="tesseract-ocr" scheme="http://blog.machine-powers.net/tags/tesseract-ocr/"/>
    
      <category term="tesserocr" scheme="http://blog.machine-powers.net/tags/tesserocr/"/>
    
  </entry>
  
  <entry>
    <title>Python用のOCRライブラリ、tesserocrのインストール</title>
    <link href="http://blog.machine-powers.net/2018/07/12/install-tesserocr/"/>
    <id>http://blog.machine-powers.net/2018/07/12/install-tesserocr/</id>
    <published>2018-07-12T12:52:53.000Z</published>
    <updated>2018-09-30T15:06:38.259Z</updated>
    
    <content type="html"><![CDATA[<p>この記事ではオープンソースのOCRライブラリであるTesseract OCRのPythonバインディングである<a href="https://github.com/sirfz/tesserocr" target="_blank" rel="noopener">tesserocr</a>のインストールと簡単な使用例を紹介します。</p><a id="more"></a><p>Tesseract OCRのPython用ラッパーは<a href="https://gitlab.gnome.org/World/OpenPaperwork/pyocr" target="_blank" rel="noopener"><code>pyocr</code></a>、<a href="https://github.com/madmaze/pytesseract" target="_blank" rel="noopener"><code>pytesseract</code></a>、<code>tesserocr</code>の3つがあります。</p><p><code>tesserocr</code>はCythonを用いてC++のAPI（<code>libtesseract</code>）を使用するため、<code>tesseract</code>コマンドを呼び出す<code>pytesseract</code>より性能面で優位です（理論上は）。</p><p><code>pyocr</code>はコマンド呼び出し、APIの両方に対応するようですが試していません。</p><h2><span id="目次">目次</span><a href="#目次" class="header-anchor">#</a></h2><div class="toc"><!-- toc --><ul><li><a href="#環境及び前提条件">環境及び前提条件</a></li><li><a href="#tesseract-本体およびビルドに必要なパッケージのインストール">Tesseract 本体およびビルドに必要なパッケージのインストール</a><ul><li><a href="#日本語用のデータファイル言語データのインストール">日本語用のデータファイル（言語データ）のインストール</a></li><li><a href="#tesseract-の動作チェック">Tesseract の動作チェック</a></li></ul></li><li><a href="#作業ディレクトリの作成とtesserocrのインストール">作業ディレクトリの作成とtesserocrのインストール</a></li><li><a href="#tesserocr-の基本的な使い方">tesserocr の基本的な使い方</a></li><li><a href="#補足情報">補足情報</a><ul><li><a href="#osdetecth問題">osdetect.h問題</a></li><li><a href="#ロケールチェック対策">ロケールチェック対策</a></li></ul></li><li><a href="#まとめ">まとめ</a></li></ul><!-- tocstop --></div><h2><span id="環境及び前提条件">環境及び前提条件</span><a href="#環境及び前提条件" class="header-anchor">#</a></h2><ul><li>Ubuntu 18.04 LTS</li><li>Python 3.6.5</li><li>tesserocr 2.3.0</li></ul><p>標準パッケージとしてTesseract OCRのバージョン4.xの開発版パッケージが提供されているUbuntu 18.04上で作業しています。</p><p><code>tesserocr</code>はTesseract OCRのバージョン3系でも使用可能です。</p><h2><span id="tesseract-本体およびビルドに必要なパッケージのインストール">Tesseract 本体およびビルドに必要なパッケージのインストール</span><a href="#tesseract-本体およびビルドに必要なパッケージのインストール" class="header-anchor">#</a></h2><p>Tesseract 本体のインストール。</p><figure class="highlight shell"><table><tr><td class="code"><pre><span class="line"><span class="meta">$</span><span class="bash"> sudo apt install tesseract-ocr</span></span><br></pre></td></tr></table></figure><p><code>build-essential</code>および各種<code>*-dev</code>パッケージが必要。</p><figure class="highlight q"><table><tr><td class="code"><pre><span class="line">$ sudo apt install build-essential libleptonica-<span class="built_in">dev</span> libtesseract-<span class="built_in">dev</span></span><br><span class="line">$ sudo apt-<span class="built_in">get</span> install libpython3-<span class="built_in">dev</span> python3-venv</span><br></pre></td></tr></table></figure><p><code>python3-venv</code>は<code>tesserocr</code>をインストールする環境を分離するため。</p><h3><span id="日本語用のデータファイル言語データのインストール">日本語用のデータファイル（言語データ）のインストール</span><a href="#日本語用のデータファイル言語データのインストール" class="header-anchor">#</a></h3><p><code>tesseract-ocr</code>パッケージをインストールしただけでは英語用のデータおよび文字の方向および書字系検出（OSD）用のデータしかインストールされない。</p><figure class="highlight mipsasm"><table><tr><td class="code"><pre><span class="line">$ sudo apt <span class="keyword">install </span>tesseract-ocr-<span class="keyword">jpn </span> tesseract-ocr-<span class="keyword">jpn-vert</span></span><br></pre></td></tr></table></figure><p>※ <code>tesseract-ocr-jpn-vert</code>は縦書き用のデータファイル。</p><p>Tesseract 4.xから追加された書字軽蔑のデータファイルを試す場合は下記のパッケージもインストールする。</p><figure class="highlight applescript"><table><tr><td class="code"><pre><span class="line">$ sudo apt install tesseract-ocr-<span class="keyword">script</span>-jpan tesseract-ocr-<span class="keyword">script</span>-jpan-vert</span><br></pre></td></tr></table></figure><p>どちらかのデータの認識率がいいかは不明。試した範囲では五十歩百歩。</p><h3><span id="tesseract-の動作チェック">Tesseract の動作チェック</span><a href="#tesseract-の動作チェック" class="header-anchor">#</a></h3><h4><span id="使用可能な言語の確認">使用可能な言語の確認</span><a href="#使用可能な言語の確認" class="header-anchor">#</a></h4><figure class="highlight mipsasm"><table><tr><td class="code"><pre><span class="line">$ tesseract --list-langs</span><br><span class="line">List of available languages (<span class="number">6</span>):</span><br><span class="line"><span class="keyword">Japanese</span></span><br><span class="line"><span class="keyword">eng</span></span><br><span class="line"><span class="keyword">Japanese_vert</span></span><br><span class="line"><span class="keyword">jpn_vert</span></span><br><span class="line"><span class="keyword">osd</span></span><br><span class="line"><span class="keyword">jpn</span></span><br></pre></td></tr></table></figure><p>コマンドの構文は下記のとおり。</p><figure class="highlight shell"><table><tr><td class="code"><pre><span class="line"><span class="meta">$</span><span class="bash"> tesseract -l lang 入力画像ファイル 出力ファイルの接頭辞 オプション</span></span><br></pre></td></tr></table></figure><p>オプションはハイフン形式か、パラメータを記述したファイルの名称を指定。<br>入力・出力にそれぞれ<code>stdin</code>、<code>stdout</code>を指定すると標準入力、標準出力となる。</p><figure class="highlight console"><figcaption><span>"example 1"</span></figcaption><table><tr><td class="code"><pre><span class="line"><span class="meta">$</span><span class="bash"> tesseract -l jpn test.png stdout --psm 6</span></span><br></pre></td></tr></table></figure><p>認識結果の文字列が出力されればOK。</p><p>書字系別のデータファイル場合の例は以下のとおり。</p><figure class="highlight console"><figcaption><span>"example 2"</span></figcaption><table><tr><td class="code"><pre><span class="line"><span class="meta">$</span><span class="bash"> tesseract -l Japanese test.png stdout --psm 6</span></span><br></pre></td></tr></table></figure><p>試した範囲では余計な空白が入ってしまう。</p><h2><span id="作業ディレクトリの作成とtesserocrのインストール">作業ディレクトリの作成とtesserocrのインストール</span><a href="#作業ディレクトリの作成とtesserocrのインストール" class="header-anchor">#</a></h2><figure class="highlight shell"><table><tr><td class="code"><pre><span class="line"><span class="meta">$</span><span class="bash"> mkdir workplace</span></span><br><span class="line"><span class="meta">$</span><span class="bash"> <span class="built_in">cd</span> workplace</span></span><br></pre></td></tr></table></figure><figure class="highlight shell"><table><tr><td class="code"><pre><span class="line"><span class="meta">$</span><span class="bash"> python3 -m venv venv</span></span><br><span class="line"><span class="meta">$</span><span class="bash"> <span class="built_in">source</span> venv/bin/activate</span></span><br></pre></td></tr></table></figure><p>画像処理ライブラリとしてPillowをインストールする（オプション）。</p><figure class="highlight shell"><table><tr><td class="code"><pre><span class="line"><span class="meta">$</span><span class="bash"> pip install pillow</span></span><br></pre></td></tr></table></figure><p>最後に本命の<code>tesserocr</code>をインストールする。</p><figure class="highlight shell"><table><tr><td class="code"><pre><span class="line"><span class="meta">$</span><span class="bash"> pip install tesserocr</span></span><br></pre></td></tr></table></figure><p>“Failed building wheel for tesserocr”というエラーメッセージが表示されるが<br>インストール自体は成功しているので無視してよい。</p><p><code>bdist_wheel</code>コマンドが見つからないという原因によるもの。</p><h2><span id="tesserocr-の基本的な使い方">tesserocr の基本的な使い方</span><a href="#tesserocr-の基本的な使い方" class="header-anchor">#</a></h2><p>対象の言語を<code>image_to_text</code>メソッドの<code>lang=</code>オプションに指定する。<br>省略した場合は<code>eng</code>（英語）。</p><figure class="highlight arduino"><table><tr><td class="code"><pre><span class="line">#! /usr/bin/env python3</span><br><span class="line"></span><br><span class="line"><span class="keyword">import</span> tesserocr</span><br><span class="line"></span><br><span class="line"><span class="keyword">import</span> tesserocr</span><br><span class="line">from PIL <span class="keyword">import</span> Image</span><br><span class="line"></span><br><span class="line"><span class="built_in">image</span> = Image.<span class="built_in">open</span>(<span class="string">'test.png'</span>)</span><br><span class="line"></span><br><span class="line"><span class="built_in">print</span>(tesserocr.image_to_text(<span class="built_in">image</span>, lang=<span class="string">'jpn'</span>))</span><br></pre></td></tr></table></figure><p><img src="/images/tesserocr/test.png" alt="テスト用の画像ファイル"></p><figure class="highlight console"><table><tr><td class="code"><pre><span class="line"><span class="meta">$</span><span class="bash"> python test_ocr.py</span></span><br><span class="line">これは日本語の文章です。Ltnux上のエディタで作成しています。</span><br><span class="line">Ubuntu 18.64 LTS</span><br><span class="line"></span><br><span class="line">LsTM搭載の、新しい認識エンジンのテストです。</span><br></pre></td></tr></table></figure><p>かなり惜しいですね。</p><h2><span id="補足情報">補足情報</span><a href="#補足情報" class="header-anchor">#</a></h2><p>バージョン4.00.beta.3以降での注意点。</p><ul><li><code>osdetect.h</code>というファイルが<code>include</code>ディレクトリにコピーされなくなった</li><li>API呼び出し時にロケールのチェック処理が入るようになった</li></ul><p>まず1つ目の問題。<code>osdetect.h</code>というファイルが見つからないために<code>tesserocr</code>のインストールが失敗します。対処法ほとしてはTesseractのソースアーカイブから対象ファイルを<code>include</code>ディレクトリにコピーするだけです。</p><p>なお、修正がマージされているのでbeta.5または安定版リリースでは修正されるはずです。</p><p>次に2つ目の問題について。こちらはロケールによって発生するケースが報告されたため、その対策として<a href="https://github.com/tesseract-ocr/tesseract/commit/3292484f67af8bdda23aa5e510918d0115785291#diff-903b81bdfe923135ee1d03800c400ed8" target="_blank" rel="noopener">チェック処理が追加</a>されています。<br>後述のようにAPI呼び出し前にロケール設定を変更することで対応できます。</p><p>ロケール変更が好ましくない場合は、現在のロケール設定を保存しておいて処理が完了してからAPI設定をもとに戻すという方法があります。</p><ul><li><a href="https://github.com/tesseract-ocr/tesseract/commit/3292484f67af8bdda23aa5e510918d0115785291#diff-903b81bdfe923135ee1d03800c400ed8" target="_blank" rel="noopener">Test for correct locale settings · tesseract-ocr/tesseract@3292484</a><br>(<a href="https://github.com/sirfz/tesserocr/issues/137" target="_blank" rel="noopener">https://github.com/sirfz/tesserocr/issues/137</a>)</li><li><a href="https://github.com/ropensci/tesseract/commit/2784542f7cd21ed99a9b5b43961179a4922e7383" target="_blank" rel="noopener">Various fixes for Tesseract 4 beta.3 · ropensci/tesseract@2784542</a></li><li>[Couldn’t import tesserocr, because locale check error · Issue #137 · sirfz/tesserocr]</li></ul><h3><span id="osdetecth問題">osdetect.h問題</span><a href="#osdetecth問題" class="header-anchor">#</a></h3><p>インストール済みのTesseractのバージョンに対応したソースコードを<a href="https://github.com/tesseract-ocr/tesseract/releases" target="_blank" rel="noopener">リリースページ</a>から入手するか、<code>git clone</code>してソースコードを入手。</p><p><code>osdetect.h</code>というファイルが<code>include</code>ディレクトリにコピーされなくなっています。</p><figure class="highlight sh"><table><tr><td class="code"><pre><span class="line">$ <span class="built_in">cd</span> tesseract</span><br><span class="line">$ cp /src/ccmain/osdetect.h /usr/<span class="built_in">local</span>/include/tesseract</span><br></pre></td></tr></table></figure><p>コピー先は環境に応じて適宜変更のこと。</p><h3><span id="ロケールチェック対策">ロケールチェック対策</span><a href="#ロケールチェック対策" class="header-anchor">#</a></h3><p>具体的なエラーメッセージは以下のとおり。Pythonインタプリタが強制終了します。</p><figure class="highlight cpp"><table><tr><td class="code"><pre><span class="line">!<span class="built_in">strcmp</span>(locale, <span class="string">"C"</span>):Error:Assert failed:in file baseapi.cpp, line <span class="number">203</span></span><br><span class="line">Abort trap: <span class="number">6</span></span><br></pre></td></tr></table></figure><p>Python側でLocaleを<code>C</code>にセットすればOK。</p><figure class="highlight python"><table><tr><td class="code"><pre><span class="line"><span class="keyword">import</span> locale</span><br><span class="line">locale.setlocale(locale.LC_ALL, <span class="string">'C'</span>)</span><br><span class="line"><span class="keyword">import</span> tesserocr</span><br></pre></td></tr></table></figure><h2><span id="まとめ">まとめ</span><a href="#まとめ" class="header-anchor">#</a></h2><p>この記事の最大のポイントは、Tesseract OCRのPython用ラッパーは<code>pytesseract</code>だけではないというところ。</p><p>より高度な使い方、Pillow、OpenCVの連携は別記事で。</p>]]></content>
    
    <summary type="html">
    
      &lt;p&gt;この記事ではオープンソースのOCRライブラリであるTesseract OCRのPythonバインディングである&lt;a href=&quot;https://github.com/sirfz/tesserocr&quot; target=&quot;_blank&quot; rel=&quot;noopener&quot;&gt;tesserocr&lt;/a&gt;のインストールと簡単な使用例を紹介します。&lt;/p&gt;
    
    </summary>
    
      <category term="IT" scheme="http://blog.machine-powers.net/categories/IT/"/>
    
      <category term="Programming" scheme="http://blog.machine-powers.net/categories/IT/Programming/"/>
    
    
      <category term="OCR" scheme="http://blog.machine-powers.net/tags/OCR/"/>
    
      <category term="python3" scheme="http://blog.machine-powers.net/tags/python3/"/>
    
      <category term="tesseract-ocr" scheme="http://blog.machine-powers.net/tags/tesseract-ocr/"/>
    
      <category term="tesserocr" scheme="http://blog.machine-powers.net/tags/tesserocr/"/>
    
  </entry>
  
  <entry>
    <title>PandocのインストールとPDF生成（macOS）</title>
    <link href="http://blog.machine-powers.net/2018/07/02/install-pandoc-and-generate-pdf/"/>
    <id>http://blog.machine-powers.net/2018/07/02/install-pandoc-and-generate-pdf/</id>
    <published>2018-07-02T10:06:47.000Z</published>
    <updated>2018-09-30T15:06:38.259Z</updated>
    
    <content type="html"><![CDATA[<p>macOSへのPandocのインストールと日本語を含むPDFの生成。</p><a id="more"></a><p><strong>[2018/09/18 追記]</strong></p><ul><li>不要な<code>-s</code>オプションを削除</li><li>wkhtmltopdf を使用する例を追加</li></ul><h2><span id="目次">目次</span><a href="#目次" class="header-anchor">#</a></h2><div class="toc"><!-- toc --><ul><li><a href="#pandocのインストール">Pandocのインストール</a></li><li><a href="#mactexbasictexパッケージのインストール">MacTex（BasicTexパッケージ）のインストール</a></li><li><a href="#pdf生成">PDF生成</a><ul><li><a href="#pandocluatexによるpdf変換">pandoc+luatexによるPDF変換</a></li><li><a href="#luatexのエラーと対処">luatexのエラーと対処</a></li></ul></li><li><a href="#pandocのアンイストール">Pandocのアンイストール</a></li><li><a href="#別解">別解</a><ul><li><a href="#実行方法">実行方法</a></li></ul></li><li><a href="#リンク">リンク</a></li></ul><!-- tocstop --></div><h2><span id="pandocのインストール">Pandocのインストール</span><a href="#pandocのインストール" class="header-anchor">#</a></h2><p>Homebrewでインストールしてもいい((最近はバイナリがインストールされるので遅くはないはず))と思うが、公式サイトでパッケージからの手順が紹介されているので、公式パッケージからインストール。</p><p>パッケージからインストールする。</p><p><a href="https://github.com/jgm/pandoc/releases" target="_blank" rel="noopener">Releases · jgm/pandoc · GitHub</a></p><p>拡張子が<code>.pkg</code>のファイルをダウンロードしてダブルクリック。あとは画面の支持に従う。<br>途中でパスワードを要求されるのでログインする際のパスワードを入力。</p><h2><span id="mactexbasictexパッケージのインストール">MacTex（BasicTexパッケージ）のインストール</span><a href="#mactexbasictexパッケージのインストール" class="header-anchor">#</a></h2><p>PDFへの変換にLuaTexが必要らしいのでMac向けのTexLiveパッケージのうち軽量版であるMacTexのBasicTexパッケージをインストールする。LuaTexでなくても変換はできるはずなので別途確認予定。</p><p><a href="http://tug.org/mactex/morepackages.html" target="_blank" rel="noopener">More Packages - MacTeX - TeX Users Group</a></p><p>環境変数PAHTに<code>/usr/local/texlive/2018basic/bin/x86_64-darwin/</code>を追加する。</p><p><code>~/.bashrc</code>に下記を追加。</p><figure class="highlight console"><table><tr><td class="code"><pre><span class="line">export PATH=/usr/local/texlive/2018basic/bin/x86_64-darwin/:$PATH</span><br></pre></td></tr></table></figure><p>最新版へのアップデートと日本語用パッケージを追加。</p><figure class="highlight console"><table><tr><td class="code"><pre><span class="line"><span class="meta">$</span><span class="bash"> sudo tlmgr update --self --all</span></span><br><span class="line"><span class="meta">$</span><span class="bash"> sudo tlmgr paper a4</span></span><br><span class="line"><span class="meta">$</span><span class="bash"> sudo tlmgr install collection-langjapanese collection-luatex lm-math</span></span><br></pre></td></tr></table></figure><p><code>tlmgr update</code>は結構時間がかかる。他にも使用する機能によっては追加のパッケージのインストールが必要。面倒ならBasicTexではなく通常版（4GBぐらい）を<br>インストールする。</p><p>参考：<a href="https://qiita.com/yskuniv/items/8d9558b6d2edf8846520" target="_blank" rel="noopener">Mac に最小限の LaTeX 環境を導入する（2018年版） - Qiita</a></p><h2><span id="pdf生成">PDF生成</span><a href="#pdf生成" class="header-anchor">#</a></h2><p>適当な内容でMarkdownのテキストを用意する</p><figure class="highlight markdown"><figcaption><span>test1.md</span></figcaption><table><tr><td class="code"><pre><span class="line"><span class="section"># 見出し1</span></span><br><span class="line"></span><br><span class="line">Hellow, Pandoc!</span><br><span class="line"></span><br><span class="line"><span class="section"># 見出し2</span></span><br><span class="line"></span><br><span class="line"><span class="section">## 小見出し1</span></span><br><span class="line"></span><br><span class="line">MarkdownからPDFへの変換テストです。</span><br><span class="line"></span><br><span class="line">::: 囲み領域</span><br><span class="line"></span><br><span class="line">この領域がどう変換されるか。</span><br><span class="line"></span><br><span class="line">:::</span><br><span class="line"></span><br><span class="line">ここでテキスト終わり。</span><br></pre></td></tr></table></figure><h3><span id="pandocluatexによるpdf変換">pandoc+luatexによるPDF変換</span><a href="#pandocluatexによるpdf変換" class="header-anchor">#</a></h3><p>PDF変換のバックエンドとしてLuaTexを指定する場合のメモ。</p><figure class="highlight console"><table><tr><td class="code"><pre><span class="line"><span class="meta">$</span><span class="bash"> pandoc test1.md -f markdown  -o test1.pdf --pdf-engine lualatex</span></span><br></pre></td></tr></table></figure><p>オプションを指定しないと日本語が表示されず、<code>[WARNING] Missing character: There is no * (U+****) in font [lmroman12-bold]:+tlig;!</code>という警告が表示される（*の部分は文字によって変わる）。</p><figure class="highlight console"><table><tr><td class="code"><pre><span class="line"><span class="meta">$</span><span class="bash"> pandoc test1.md -f markdown  -o test1.pdf --pdf-engine lualatex -V documentclass=ltjarticle</span></span><br></pre></td></tr></table></figure><p><a href="/images/pandoc/test1.pdf">生成されたPDFファイル</a>  </p><p>HTML形式にの場合に<code>div</code>タグに変換される<code>native_divs</code>拡張の部分（コロン3つで囲んだ部分）は特別扱いされていない。</p><h3><span id="luatexのエラーと対処">luatexのエラーと対処</span><a href="#luatexのエラーと対処" class="header-anchor">#</a></h3><figure class="highlight console"><table><tr><td class="code"><pre><span class="line">Error producing PDF.</span><br><span class="line">! LaTeX Error: File `lualatex-math.sty' not found.</span><br></pre></td></tr></table></figure><p>上記のエラーは<code>lm-math</code>パッケージをインストールすると解決する。</p><h2><span id="pandocのアンイストール">Pandocのアンイストール</span><a href="#pandocのアンイストール" class="header-anchor">#</a></h2><p>公式パッケージからインストールした場合のアンイストール方法。</p><p>公式サイトからアンイストール用のPerlスクリプトを入手。</p><figure class="highlight console"><table><tr><td class="code"><pre><span class="line"><span class="meta">$</span><span class="bash"> wget https://raw.githubusercontent.com/jgm/pandoc/master/macos/uninstall-pandoc.pl</span></span><br></pre></td></tr></table></figure><p>ダウンロードしたスクリプトを実行する。パスワードを聞かれるので実行したユーザーのパスワードを入力する。</p><p>途中でアンイストールしてよいかどうか、確認メッセージが表示されるので”y”と入力。</p><figure class="highlight console"><table><tr><td class="code"><pre><span class="line"><span class="meta">$</span><span class="bash"> perl uninstall-pandoc.pl</span></span><br></pre></td></tr></table></figure><p>以下は実行ログ。</p><figure class="highlight console"><table><tr><td class="code"><pre><span class="line">The following files will be deleted:</span><br><span class="line"></span><br><span class="line">/usr/local/bin/pandoc</span><br><span class="line">/usr/local/bin/pandoc-citeproc</span><br><span class="line">/usr/local/share/man/man1/pandoc-citeproc.1</span><br><span class="line">/usr/local/share/man/man1/pandoc.1</span><br><span class="line"></span><br><span class="line">Do you want to proceed and uninstall pandoc (Y/N)?y</span><br><span class="line">Password:</span><br><span class="line">Deleted /usr/local/bin/pandoc</span><br><span class="line">Deleted /usr/local/bin/pandoc-citeproc</span><br><span class="line">Deleted /usr/local/share/man/man1/pandoc-citeproc.1</span><br><span class="line">Deleted /usr/local/share/man/man1/pandoc.1</span><br><span class="line">Forgot package 'net.johnmacfarlane.pandoc' on '/'.</span><br><span class="line">Pandoc has been successfully uninstalled.</span><br></pre></td></tr></table></figure><h2><span id="別解">別解</span><a href="#別解" class="header-anchor">#</a></h2><p>デフォルトではTeXを使わずにwkhtmltopdfを使う。必要なディスク容量はこちらのほうが少ない。</p><p>細かく外観をいじりたいなら、TeXを使用する方法がベター。</p><p>縦書きに対応できるかは試していない。</p><figure class="highlight console"><table><tr><td class="code"><pre><span class="line"><span class="meta">$</span><span class="bash"> brew cask install wkhtmltopdf</span></span><br></pre></td></tr></table></figure><h3><span id="実行方法">実行方法</span><a href="#実行方法" class="header-anchor">#</a></h3><p><code>wkhtmltopdf</code>を呼び出したい場合は<code>-t html</code>で内部的にHTMLにする。</p><figure class="highlight console"><table><tr><td class="code"><pre><span class="line"><span class="meta">$</span><span class="bash"> pandoc sample.md -f markdown -t html  -o test2.pdf</span></span><br></pre></td></tr></table></figure><p>もしくは、明示的に<code>--pdf-engine wkhtmltopdf</code>とする。</p><figure class="highlight console"><table><tr><td class="code"><pre><span class="line"><span class="meta">$</span><span class="bash"> pandoc sample.md -f markdown  -o test3.pdf --pdf-engine wkhtmltopdf</span></span><br></pre></td></tr></table></figure><h2><span id="リンク">リンク</span><a href="#リンク" class="header-anchor">#</a></h2><p>以下参考になりそうなエントリ各種。</p><ul><li><a href="https://qiita.com/yyu/items/e3451caa86779b94abe1" target="_blank" rel="noopener">LaTeXとTravis CIでヒラギノフォント埋め込みPDFを作る - Qiita</a></li><li><a href="https://babooshka-innerjourneys.blogspot.com/2015/05/pandoclualatexpdf.html" target="_blank" rel="noopener">Inner Journeys: PandocとLuaLaTeXを使ったPDF出力でコードブロックをきれいに表示する</a></li><li><a href="https://orumin.blogspot.com/2017/09/pandoc-markdown-pdf.html" target="_blank" rel="noopener">Pandoc で日本語を含む Markdown から PDF を生成することをラクにしようとした</a></li></ul>]]></content>
    
    <summary type="html">
    
      &lt;p&gt;macOSへのPandocのインストールと日本語を含むPDFの生成。&lt;/p&gt;
    
    </summary>
    
      <category term="IT" scheme="http://blog.machine-powers.net/categories/IT/"/>
    
      <category term="Software" scheme="http://blog.machine-powers.net/categories/IT/Software/"/>
    
      <category term="Pandoc" scheme="http://blog.machine-powers.net/categories/IT/Software/Pandoc/"/>
    
    
      <category term="pandoc" scheme="http://blog.machine-powers.net/tags/pandoc/"/>
    
      <category term="luatex" scheme="http://blog.machine-powers.net/tags/luatex/"/>
    
      <category term="markdown" scheme="http://blog.machine-powers.net/tags/markdown/"/>
    
      <category term="pdf" scheme="http://blog.machine-powers.net/tags/pdf/"/>
    
      <category term="macOS" scheme="http://blog.machine-powers.net/tags/macOS/"/>
    
      <category term="wkhtmltopdf" scheme="http://blog.machine-powers.net/tags/wkhtmltopdf/"/>
    
  </entry>
  
  <entry>
    <title>Hexoでブログ記事を書く</title>
    <link href="http://blog.machine-powers.net/2018/07/02/writing-post-with-hexo/"/>
    <id>http://blog.machine-powers.net/2018/07/02/writing-post-with-hexo/</id>
    <published>2018-07-02T09:56:10.000Z</published>
    <updated>2018-09-30T15:06:38.260Z</updated>
    
    <content type="html"><![CDATA[<p>HexoではMarkdown形式でブログを書きます。通常のMarkdown記法に加えてHexo独自のタグを使用できます。</p><p>また、Tag Pluginsをインストールすることで拡張することができます。</p><a id="more"></a><h2><span id="目次">目次</span><a href="#目次" class="header-anchor">#</a></h2><div class="toc"><!-- toc --><ul><li><a href="#基本">基本</a></li><li><a href="#記事を書く手順とhexoの基本コマンド">記事を書く手順とHexoの基本コマンド</a><ul><li><a href="#記事を書く手順">記事を書く手順</a></li><li><a href="#hexoの基本コマンド">Hexoの基本コマンド</a></li></ul></li><li><a href="#記事の作成">記事の作成</a><ul><li><a href="#リンク">リンク</a></li><li><a href="#画像の挿入">画像の挿入</a></li><li><a href="#目次の生成">目次の生成</a></li><li><a href="#続きを読む">「続きを読む」</a></li><li><a href="#コードブロック">コードブロック</a></li></ul></li><li><a href="#注意点">注意点</a></li><li><a href="#ノウハウ関連リンク集">ノウハウ関連リンク集</a><ul><li><a href="#カテゴリに関する補足">カテゴリに関する補足</a></li><li><a href="#more-続きを読む">more （続きを読む）</a></li><li><a href="#リンクのプレビューの埋め込み">リンクのプレビューの埋め込み</a></li><li><a href="#その他の参考サイト">その他の参考サイト</a></li></ul></li></ul><!-- tocstop --></div><h2><span id="基本">基本</span><a href="#基本" class="header-anchor">#</a></h2><ul><li><a href="https://hexo.io/docs/writing.html" target="_blank" rel="noopener">Writing | Hexo</a></li><li><a href="https://hexo.io/docs/tag-plugins.html" target="_blank" rel="noopener">Tag Plugins | Hexo</a></li></ul><h2><span id="記事を書く手順とhexoの基本コマンド">記事を書く手順とHexoの基本コマンド</span><a href="#記事を書く手順とhexoの基本コマンド" class="header-anchor">#</a></h2><h3><span id="記事を書く手順">記事を書く手順</span><a href="#記事を書く手順" class="header-anchor">#</a></h3><p>下書きしてから書く場合の手順。</p><ol><li>hexo new draft <title></title></li><li>hexo server –draft –watch</li><li>ブラウザでプレビュー表示を確認</li><li>hexo publish <title></title></li></ol><p><code>&lt;title&gt;</code>の部分は記事のタイトルにする文字列を指定する。指定した文字列から空白をハイフンに変換し、小文字化した文字列がファイル名になる（<code>_config.yml</code>の<code>new_post_name</code>などのパラメータで制御される）。</p><p><code>hexo server</code>でプレビュー表示用のサーバーが起動する。<br>ブラウザで<a href="http://localhost:4000/" target="_blank" rel="noopener">http://localhost:4000/</a>に接続するとプレビュー表示を確認できる。</p><p>ブログエントリではなくいわゆる固定ページを作成したい場合は、<code>hexo new page &lt;title&gt;</code>。</p><h3><span id="hexoの基本コマンド">Hexoの基本コマンド</span><a href="#hexoの基本コマンド" class="header-anchor">#</a></h3><ul><li><p>hexo clean </p><p>  生成したHTMLとキャッシュの消去。</p></li><li><p>hexo config</p><p>  エディタを使わずにhexo の設定を変更できる。</p></li><li><p>hexo deploy</p><p>  デプロイ設定に従って生成したHTMLをサーバーにデプロイする。<br>  NetlifyとGitリポジトリを連携している場合など、など、サーバー側で<code>hexo generate</code>するなら不要。</p></li><li><p>hexo generate </p><p>  HTMLを生成する。</p></li><li><p>hexo help</p><p> ヘルプの表示。</p></li><li><p>hexo init</p><p>  コンテンツを格納するディレクトリ、設定ファイルの生成。</p></li><li><p>hexo migrate</p><p>  他のブログシステムからの移行ツール。</p></li><li><p>hexo list </p><p>  このコマンドはなかなか便利。現在のドラフトや作成済みの記事内のタグやカテゴリの情報を出力してくれる。</p>  <figure class="highlight lasso"><table><tr><td class="code"><pre><span class="line">$ hexo <span class="built_in">list</span> <span class="built_in">tag</span></span><br></pre></td></tr></table></figure></li><li><p>hexo new</p><p>  ポストあるいはページの雛形を生成。</p></li><li><p>hexo publish</p><p> 日付のタグをfront-matterに追加する。<br> git でdraftを管理している場合、<code>git mv</code>せずにファイルを移動するため、<br> 履歴が失われてしまう。この問題は<code>git add .</code>すれば解決する。</p></li><li><p>hexo render</p><p>  render系のプラグインによるファイル生成。</p></li><li><p>hexo server</p><p>  プレビューのサーバーを起動する。</p></li><li><p>hexo version</p><p>  バージョン表示。</p></li></ul><h2><span id="記事の作成">記事の作成</span><a href="#記事の作成" class="header-anchor">#</a></h2><p>Hexo独自の記法のリストについてはプラグインの一覧ページを参照。</p><p><a href="https://hexo.io/docs/tag-plugins.html" target="_blank" rel="noopener">Tag Plugins | Hexo</a></p><h3><span id="リンク">リンク</span><a href="#リンク" class="header-anchor">#</a></h3><p>一番単純な形式：</p><figure class="highlight markdown"><table><tr><td class="code"><pre><span class="line">[<span class="string">リンク文字列</span>](<span class="link">http://example.com</span>)</span><br></pre></td></tr></table></figure><h3><span id="画像の挿入">画像の挿入</span><a href="#画像の挿入" class="header-anchor">#</a></h3><p>画像の配置場所に関しては次の２通りの方法がある。</p><ul><li>Global Asset Folder</li><li>Post Asset Folder</li></ul><p>参考：<a href="https://hexo.io/docs/asset-folders.html" target="_blank" rel="noopener">Asset Folders | Hexo</a></p><p>デフォルトの状態ではGlobal Asset Folder。</p><h4><span id="記述方法">記述方法</span><a href="#記述方法" class="header-anchor">#</a></h4><p>以下、Global Asset Folderの場合。画像へのパスは相対リンクでかつ、<code>/</code>で始まっている必要あり。</p><ol><li><p>Hexo記法</p> <figure class="highlight clojure"><table><tr><td class="code"><pre><span class="line">&#123;% img [class名] [画像へのパス] [widhth] [height] [title] %&#125;</span><br></pre></td></tr></table></figure><p> テーマ側でfancyboxが有効になっている場合、画像をクリックすると拡大画像が表示される。</p><p> また、Post Asset Folderが有効になっている場合、下記の初期も使用できる。</p> <figure class="highlight maxima"><table><tr><td class="code"><pre><span class="line">&#123;<span class="symbol">%</span> asset_img <span class="built_in">example</span>.jpg This <span class="built_in">is</span> an <span class="built_in">example</span> <span class="built_in">image</span> <span class="symbol">%</span></span><br></pre></td></tr></table></figure></li><li><p>Markdown</p> <figure class="highlight markdown"><table><tr><td class="code"><pre><span class="line">![<span class="string">alt属性テキスト</span>](<span class="link">画像ファイルのパス</span>)</span><br></pre></td></tr></table></figure><p> リンク付きの画像は以下のようにする。この形式を使用したい場合、<code>fancybox</code>を無効にしておく必要がある。</p> <figure class="highlight markdown"><table><tr><td class="code"><pre><span class="line">[<span class="string">![alt属性</span>](<span class="link">画像ファイルパス</span>)](<span class="link">URL</span>)</span><br></pre></td></tr></table></figure><p> fancyboxが有効になっている場合、画像自体をリンクにすることはできない。</p></li></ol><p><a href="https://nkmk.github.io/blog/hexo-image/" target="_blank" rel="noopener">Hexoで画像を表示 | nkmk log</a></p><h3><span id="目次の生成">目次の生成</span><a href="#目次の生成" class="header-anchor">#</a></h3><p>目次生成用のプラグインのインストール。</p><figure class="highlight shell"><table><tr><td class="code"><pre><span class="line"><span class="meta">$</span><span class="bash"> npm install hexo-toc --save</span></span><br></pre></td></tr></table></figure><p>詳細： <a href="https://www.npmjs.com/package/hexo-toc" target="_blank" rel="noopener">hexo-toc - npm</a></p><p>使い方としては、記事の冒頭付近で下記のように記述。</p><figure class="highlight xml"><table><tr><td class="code"><pre><span class="line"><span class="comment">&lt;!-- toc --&gt;</span></span><br></pre></td></tr></table></figure><h3><span id="続きを読む">「続きを読む」</span><a href="#続きを読む" class="header-anchor">#</a></h3><p>冒頭の適当な位置に\<!-- more -->と記述。</p><figure class="highlight xml"><table><tr><td class="code"><pre><span class="line"><span class="comment">&lt;!-- more --&gt;</span></span><br></pre></td></tr></table></figure><h3><span id="コードブロック">コードブロック</span><a href="#コードブロック" class="header-anchor">#</a></h3><p>行番号の有無などの設定は<code>_config.yml</code>。</p><figure class="highlight yaml"><table><tr><td class="code"><pre><span class="line"><span class="attr">highlight:</span></span><br><span class="line"><span class="attr">  enable:</span> <span class="literal">true</span></span><br><span class="line"><span class="attr">  line_number:</span> <span class="literal">false</span></span><br><span class="line"><span class="attr">  auto_detect:</span> <span class="literal">true</span></span><br><span class="line"><span class="attr">  tab_replace:</span></span><br></pre></td></tr></table></figure><p>Hexo形式の場合、個別に行番号の有無を切り替えることができる。</p><h4><span id="一般的なmarkdown形式">一般的なMarkdown形式</span><a href="#一般的なmarkdown形式" class="header-anchor">#</a></h4><p>インライン形式と、ブロック形式がある。</p><ul><li>インライン形式: バッククォートで文字を囲む（”`test`“）</li></ul><h4><span id="hexo形式">Hexo形式</span><a href="#hexo形式" class="header-anchor">#</a></h4><figure class="highlight accesslog"><table><tr><td class="code"><pre><span class="line">&#123;% codeblock <span class="string">[title]</span> <span class="string">[lang:language]</span> <span class="string">[url]</span> <span class="string">[link text]</span> %&#125;</span><br><span class="line">code snippet</span><br><span class="line">&#123;% endcodeblock %&#125;</span><br></pre></td></tr></table></figure><h2><span id="注意点">注意点</span><a href="#注意点" class="header-anchor">#</a></h2><p><code>hexo server</code>によるプレビューの際、<code>_config</code>ファイルを変更したあとは再起動が必要。</p><h2><span id="ノウハウ関連リンク集">ノウハウ関連リンク集</span><a href="#ノウハウ関連リンク集" class="header-anchor">#</a></h2><h3><span id="カテゴリに関する補足">カテゴリに関する補足</span><a href="#カテゴリに関する補足" class="header-anchor">#</a></h3><p><a href="https://tech.qookie.jp/posts/hexo-frontmatter-category-tag/" target="_blank" rel="noopener">HexoのFront-matterにカテゴリーとタグを上手く設定する方法 | Qookie Tech</a></p><h3><span id="more-続きを読む">more （続きを読む）</span><a href="#more-続きを読む" class="header-anchor">#</a></h3><p><a href="https://katsunory.github.io/2017/03/06/hexo-customize-excerpt/" target="_blank" rel="noopener">Hexoでトップページに記事の概要を出す方法 | Katsunori Nippo</a></p><h3><span id="リンクのプレビューの埋め込み">リンクのプレビューの埋め込み</span><a href="#リンクのプレビューの埋め込み" class="header-anchor">#</a></h3><p><a href="https://minamo173.com/2018/04/16/publish-hexo-tag-link-preview/" target="_blank" rel="noopener">hexo-tag-link-previewをnpmで公開しました。 | 海月暮らし</a></p><p>ページによってはうまく動かないかも。</p><h3><span id="その他の参考サイト">その他の参考サイト</span><a href="#その他の参考サイト" class="header-anchor">#</a></h3><ul><li><a href="https://qiita.com/in_silico_/items/31c2c0bc1cf061c86250" target="_blank" rel="noopener">Hexoで始めるお手軽な静的ブログ　-画像投稿とプラグインの追加- - Qiita</a></li><li><a href="https://keijirotanabe.github.io/blog/2017/02/04/markdown/" target="_blank" rel="noopener">HEXOで使えるMarkDown記法 | blog</a></li></ul>]]></content>
    
    <summary type="html">
    
      &lt;p&gt;HexoではMarkdown形式でブログを書きます。通常のMarkdown記法に加えてHexo独自のタグを使用できます。&lt;/p&gt;
&lt;p&gt;また、Tag Pluginsをインストールすることで拡張することができます。&lt;/p&gt;
    
    </summary>
    
      <category term="IT" scheme="http://blog.machine-powers.net/categories/IT/"/>
    
      <category term="Software" scheme="http://blog.machine-powers.net/categories/IT/Software/"/>
    
    
      <category term="Hexo" scheme="http://blog.machine-powers.net/tags/Hexo/"/>
    
  </entry>
  
  <entry>
    <title>Hexoの基本的なプラグインとカスタマイズ</title>
    <link href="http://blog.machine-powers.net/2018/06/26/setup-hexo-detail/"/>
    <id>http://blog.machine-powers.net/2018/06/26/setup-hexo-detail/</id>
    <published>2018-06-26T12:14:28.000Z</published>
    <updated>2018-09-30T15:06:38.259Z</updated>
    
    <content type="html"><![CDATA[<p>Hexoの設定とカスタマイズについて。一般的なブログを作成する場合に必要なプラグインについて紹介。</p><a id="more"></a><h2><span id="目次">目次</span><a href="#目次" class="header-anchor">#</a></h2><div class="toc"><!-- toc --><ul><li><a href="#hexoの設定">Hexoの設定</a><ul><li><a href="#画像ファイルの配置場所">画像ファイルの配置場所</a></li><li><a href="#目次に関する設定">目次に関する設定</a></li><li><a href="#サイトマップ">サイトマップ</a></li><li><a href="#rssフィード">RSSフィード</a></li><li><a href="#ogp">OGP</a></li></ul></li><li><a href="#補助ツール">補助ツール</a><ul><li><a href="#hexo-admin">hexo admin</a></li></ul></li><li><a href="#その他">その他</a><ul><li><a href="#テーマの設定値の上書き">テーマの設定値の上書き</a></li><li><a href="#独自タグの作成">独自タグの作成</a></li></ul></li><li><a href="#参考リンク">参考リンク</a></li></ul><!-- tocstop --></div><h2><span id="hexoの設定">Hexoの設定</span><a href="#hexoの設定" class="header-anchor">#</a></h2><p>公式サイト：<a href="https://hexo.io/docs/configuration.html" target="_blank" rel="noopener">Configuration | Hexo</a></p><h3><span id="画像ファイルの配置場所">画像ファイルの配置場所</span><a href="#画像ファイルの配置場所" class="header-anchor">#</a></h3><p>デフォルトでは<code>source</code>ディレクトリ直下か、<code>source/images</code>などのディレクトリを作成してそこに配置する。</p><p>別の選択肢として、<code>post_asset_folder</code>という変数を<code>true</code>にすると記事ごとに画像ファイルなどの保存ディレクトリを自動的に作成する。</p><figure class="highlight yaml"><table><tr><td class="code"><pre><span class="line"><span class="attr">post_asset_folder:</span> <span class="literal">true</span></span><br></pre></td></tr></table></figure><p>作成されるディレクトリ名は<code>hexo new post XXX</code>のように生地ファイルの名称と同じ。</p><p>関連：<a href="http://saucer-jp.github.io/2015/04/29/how-to-put-images-in-a-post/" target="_blank" rel="noopener">HexoのPostに画像を置く | SAUCER blog</a></p><p>とりあえず現状としては<code>source/images</code>というディレクトリを作成してそこに配置している。</p><h3><span id="目次に関する設定">目次に関する設定</span><a href="#目次に関する設定" class="header-anchor">#</a></h3><p>目次の挿入は<code>hexo-toc</code>というプラグインです。おそらく最初からインストールされているはず。</p><p>記事を作成する際に、目次を挿入したい位置に&lt;!– toc –&gt;と 書くとその部分に目次が挿入されます。</p><p>設定は<code>_config.yml</code>に記載。</p><figure class="highlight yaml"><figcaption><span>_config.yml</span></figcaption><table><tr><td class="code"><pre><span class="line"><span class="attr">toc:</span></span><br><span class="line"><span class="attr">  maxdepth:</span> <span class="number">3</span></span><br><span class="line"><span class="attr">  class:</span> <span class="string">toc</span></span><br><span class="line"><span class="attr">  slugify:</span> <span class="string">uslug</span></span><br><span class="line"><span class="attr">  decodeEntities:</span> <span class="literal">false</span></span><br><span class="line"><span class="attr">  anchor:</span></span><br><span class="line"><span class="attr">    position:</span> <span class="string">after</span></span><br><span class="line"><span class="attr">    symbol:</span> <span class="string">'#'</span></span><br><span class="line"><span class="attr">    style:</span> <span class="string">header-anchor</span></span><br></pre></td></tr></table></figure><p>重要なのは<code>slugify</code>という項目は見出しの文字列を変換する方法を指定するオプション。<br>URLエンコード（uslag）と音訳（transliteration）の二種類（デフォルトはuslaug）。</p><p>音訳を選ぶと例えば「見出し」が”midasi”の様に変換される。</p><p>詳細：<a href="https://github.com/bubkoo/hexo-toc" target="_blank" rel="noopener">GitHub - bubkoo/hexo-toc: 📖 Insert a markdown TOC before posts be rendered.</a></p><h4><span id="エラーとその対策">エラーとその対策</span><a href="#エラーとその対策" class="header-anchor">#</a></h4><p>上記のプラグインをインストールする際、下記のメッセージが表示されるケースがあります。</p><figure class="highlight shell"><table><tr><td class="code"><pre><span class="line">npm WARN deprecated coffee-script@1.12.7: CoffeeScript on NPM has moved to "coffeescript" (no hyphen)</span><br><span class="line">+ hexo-toc@1.1.0</span><br><span class="line">added 67 packages from 72 contributors and audited 5845 packages in 17.872s</span><br><span class="line">found 17 vulnerabilities (4 low, 13 moderate)</span><br><span class="line">  run `npm audit fix` to fix them, or `npm audit` for details</span><br></pre></td></tr></table></figure><p>メッセージにある様に、詳細を確認したい場合は<code>npm audit</code>、自動修正を試みる場合は<code>npm audit fix</code>です。</p><figure class="highlight shell"><table><tr><td class="code"><pre><span class="line"><span class="meta">$</span><span class="bash"> npm audit fix</span></span><br><span class="line">added 10 packages from 17 contributors and updated 1 package in 8.537s</span><br><span class="line">fixed 4 of 17 vulnerabilities in 5845 scanned packages</span><br><span class="line">  13 vulnerabilities required manual review and could not be updated</span><br></pre></td></tr></table></figure><p>実際に実行すると、脆弱性のうち、4つは自動修復下画の頃は手動で対処しろというメッセージが表示されます。<br>ローカルマシン上で使う限り、無視しても問題はないはず。</p><h3><span id="サイトマップ">サイトマップ</span><a href="#サイトマップ" class="header-anchor">#</a></h3><p>サイトマップのジェネレーターをインストール。</p><figure class="highlight console"><table><tr><td class="code"><pre><span class="line"><span class="meta">$</span><span class="bash"> npm install hexo-generator-sitemap --save</span></span><br></pre></td></tr></table></figure><p>詳細：<a href="https://github.com/hexojs/hexo-generator-sitemap" target="_blank" rel="noopener">hexojs/hexo-generator-sitemap: Sitemap generator for Hexo.</a>  </p><p>設定ファイルに下記を追加。</p><figure class="highlight yaml"><figcaption><span>_config.yml</span></figcaption><table><tr><td class="code"><pre><span class="line"><span class="attr">sitemap:</span></span><br><span class="line"><span class="attr">    path:</span> <span class="string">sitemap.xml</span></span><br><span class="line"><span class="attr">    template:</span> <span class="string">./sitemap_template.xml</span></span><br></pre></td></tr></table></figure><p>テンプレートとして<code>./sitemap_template.xml</code>というファイルを用意する。pluginのページの<a href="https://github.com/hexojs/hexo-generator-sitemap/blob/master/sitemap.xml" target="_blank" rel="noopener">sitemap.xml</a>をコピーする。</p><p><a href="https://github.com/hexojs/hexo-generator-sitemap/blob/master/sitemap.xml" target="_blank" rel="noopener">hexo-generator-sitemap/sitemap.xml at master · hexojs/hexo-generator-sitemap · GitHub</a></p><h3><span id="rssフィード">RSSフィード</span><a href="#rssフィード" class="header-anchor">#</a></h3><p>公式：<a href="https://github.com/hexojs/hexo-generator-feed" target="_blank" rel="noopener">GitHub - hexojs/hexo-generator-feed: Feed generator for Hexo.</a></p><p>RSSフィードのジェネレーターをインストールします。</p><figure class="highlight shell"><table><tr><td class="code"><pre><span class="line"><span class="meta">$</span><span class="bash"> npm install hexo-generator-feed</span></span><br></pre></td></tr></table></figure><p>設定に問題がないか、<code>http://localhost:4000/atom.xml</code>にアクセスして確認する。</p><p>参考：<a href="https://qiita.com/f_prg/items/c5a465c79a9980b98495" target="_blank" rel="noopener">HexoのRSSフィードプラグインを使ってみる</a></p><h3><span id="ogp">OGP</span><a href="#ogp" class="header-anchor">#</a></h3><p>OGP用のヘルパーは用意されているので、テーマが対応していれば特に問題ない。</p><p>titleやdescriptionが適切に設定してある必要あり。</p><p>コンテンツディレクトリの<code>_config.yml</code>もしくは各テーマの<code>_config</code>にSNSアカウントのIDをセットしておくと埋め込まれる。</p><figure class="highlight yaml"><figcaption><span>_config.yml</span></figcaption><table><tr><td class="code"><pre><span class="line"><span class="attr">theme_config:</span></span><br><span class="line">    <span class="string">(省略)</span></span><br><span class="line"><span class="attr">    twitter:</span> <span class="string">your_twitter_id</span></span><br><span class="line"><span class="attr">    google_plus:</span> <span class="string">your_google_plus_id</span></span><br></pre></td></tr></table></figure><p>参考：<a href="https://ishiis.net/2016/07/12/hexo-open-gragh-protocol/" target="_blank" rel="noopener">HexoでOpen Gragh Protocolの設定をする | エンジニアっぽいことを書くブログ</a></p><h2><span id="補助ツール">補助ツール</span><a href="#補助ツール" class="header-anchor">#</a></h2><h3><span id="hexo-admin">hexo admin</span><a href="#hexo-admin" class="header-anchor">#</a></h3><p><a href="https://github.com/jaredly/hexo-admin" target="_blank" rel="noopener">jaredly/hexo-admin: An Admin Interface for Hexo</a></p><p>ブラウザで記事を書くツール。ローカルマシン上で使用してもいいし、サーバー上にインストールしてもいい。</p><figure class="highlight shell"><table><tr><td class="code"><pre><span class="line"><span class="meta">$</span><span class="bash"> npm install --save hexo-admin</span></span><br></pre></td></tr></table></figure><p><code>hexo s</code>でサーバーを起動して、<code>http://localhost:4000/admin</code>にアクセスすると管理画面が表示される。</p><p>プログの記事一覧から編集したい記事を選んで、鉛筆のマークのアイコンをクリックすると編集画面が開く。編集すると記事は自動保存される。</p><p>編集画面の右上のボタンでPublish/Unpubulishを切り替えることも可能。</p><p>適切に設定していればデプロイもメニューからできるようです。</p><h2><span id="その他">その他</span><a href="#その他" class="header-anchor">#</a></h2><h3><span id="テーマの設定値の上書き">テーマの設定値の上書き</span><a href="#テーマの設定値の上書き" class="header-anchor">#</a></h3><p>コンテンツディレクトリ直下の<code>_config.yml</code>に以下のように<code>theme_config</code>というキー名のあとに記載する。</p><figure class="highlight dts"><table><tr><td class="code"><pre><span class="line"><span class="symbol">theme_config:</span></span><br><span class="line"><span class="symbol">    google_analytics:</span> XX-XXXXXX</span><br></pre></td></tr></table></figure><p><code>theme/テーマ名</code>のディレクトリにある設定ファイルを直接編集してもいいが、<code>git submodule</code>で追加している場合は避けたほうが良い((デプロイ手段の設定に依存))。</p><h3><span id="独自タグの作成">独自タグの作成</span><a href="#独自タグの作成" class="header-anchor">#</a></h3><p><a href="http://simo.website/post/hexo-my-tag-plugin/" target="_blank" rel="noopener">HexoのMarkdownを拡張する | Hello New World</a></p><h2><span id="参考リンク">参考リンク</span><a href="#参考リンク" class="header-anchor">#</a></h2><ul><li><a href="https://hexo.io/docs/index.html" target="_blank" rel="noopener">Documentation | Hexo</a></li><li><a href="https://hexo.io/docs/configuration.html" target="_blank" rel="noopener">Configuration | Hexo</a></li><li><a href="https://blog.ukai-mnap.co.jp/2017/09/26/blog-architecture/#%E3%82%BF%E3%82%B0%E3%81%A8%E3%82%AB%E3%83%86%E3%82%B4%E3%83%AA%E3%82%92%E8%A8%AD%E5%AE%9A%E3%81%99%E3%82%8B" target="_blank" rel="noopener">HEXOを使って爆速でブログを立ち上げた話 | STAY FREE</a></li><li><a href="http://hatobane.github.io/hexo/Hexo-config/" target="_blank" rel="noopener">Hexo 設定ファイル|Akanetrip</a></li></ul>]]></content>
    
    <summary type="html">
    
      &lt;p&gt;Hexoの設定とカスタマイズについて。一般的なブログを作成する場合に必要なプラグインについて紹介。&lt;/p&gt;
    
    </summary>
    
      <category term="IT" scheme="http://blog.machine-powers.net/categories/IT/"/>
    
      <category term="Software" scheme="http://blog.machine-powers.net/categories/IT/Software/"/>
    
    
      <category term="Hexo" scheme="http://blog.machine-powers.net/tags/Hexo/"/>
    
  </entry>
  
  <entry>
    <title>Hexo + Netlify でBlogを作る</title>
    <link href="http://blog.machine-powers.net/2018/06/25/hexo-with-netlify/"/>
    <id>http://blog.machine-powers.net/2018/06/25/hexo-with-netlify/</id>
    <published>2018-06-25T05:45:00.000Z</published>
    <updated>2018-09-30T15:06:38.258Z</updated>
    
    <content type="html"><![CDATA[<p>静的ページジェネレーター、Hexoと、無料ホスティングサイトのNetlifyでサイトを構築します。</p><a id="more"></a><h2><span id="目次">目次</span><a href="#目次" class="header-anchor">#</a></h2><div class="toc"><!-- toc --><ul><li><a href="#はじめに">はじめに</a></li><li><a href="#hexoのインストールと初期化">Hexoのインストールと初期化</a><ul><li><a href="#nodejsのインストール">Node.jsのインストール</a></li><li><a href="#hexoのインストール">Hexoのインストール</a></li><li><a href="#コンテンツを置くディレクトリの初期化">コンテンツを置くディレクトリの初期化</a></li><li><a href="#動作チェック">動作チェック</a></li></ul></li><li><a href="#git-リポジトリのセットアップ">git リポジトリのセットアップ</a><ul><li><a href="#初期化">初期化</a></li><li><a href="#リモートリポジトリの設定">リモートリポジトリの設定</a></li></ul></li><li><a href="#hexoの基本設定">Hexoの基本設定</a><ul><li><a href="#設定ファイルの編集">設定ファイルの編集</a></li></ul></li><li><a href="#記事の作成">記事の作成</a></li><li><a href="#デプロイ">デプロイ</a></li><li><a href="#netlify側の設定">Netlify側の設定</a></li><li><a href="#まとめ">まとめ</a></li></ul><!-- tocstop --></div><h2><span id="はじめに">はじめに</span><a href="#はじめに" class="header-anchor">#</a></h2><p>NetlifyとHexoの組み合わせですが、GitHubやbitbucketと連携させることができ、<br>デプロイ手順を簡略化できるというメリットがあります。</p><p>このブログではbitbucket経由でgitリポジトリへのpushすることで記事のデプロイを実現しています。</p><p>基本的な手順はNetlifyの公式ページをベースにしています。</p><p><a href="https://www.netlify.com/blog/2015/10/26/a-step-by-step-guide-hexo-on-netlify/" target="_blank" rel="noopener">A Step-by-Step Guide: Hexo on Netlify | Netlify</a></p><p>Netlifyにデプロイするのは生成されたHTMLではなく、Markdown形式のデータになります。</p><p>作業の流れは以下のとおりです。</p><ul><li>Node.jsのインストール</li><li>Hexoのインストール</li><li>Hexoの設定</li><li>gitリポジトリの設定</li><li>記事の作成</li><li>Netlifyとリモートリポジトリの連携</li><li>各種設定</li></ul><h2><span id="hexoのインストールと初期化">Hexoのインストールと初期化</span><a href="#hexoのインストールと初期化" class="header-anchor">#</a></h2><p>Hexoをインストールするには<a href="https://nodejs.org/ja/about/" target="_blank" rel="noopener">Node.js</a>およびnpmコマンドが必要です。</p><p>macOS上ではHomebrewを使う方法が簡単です。</p><p>Windows環境の場合はNode.jsの<a href="https://nodejs.org/ja/download/" target="_blank" rel="noopener">公式ページ</a>からダウンロードできます。</p><h3><span id="nodejsのインストール">Node.jsのインストール</span><a href="#nodejsのインストール" class="header-anchor">#</a></h3><p>Homebrew で<code>node.js</code>をインストールします。</p><figure class="highlight console"><table><tr><td class="code"><pre><span class="line"><span class="meta">$</span><span class="bash"> brew install node</span></span><br></pre></td></tr></table></figure><p><code>npm</code>コマンドが一緒にインストールされる。</p><p>バージョン確認。  </p><figure class="highlight console"><table><tr><td class="code"><pre><span class="line"><span class="meta">$</span><span class="bash"> node --version</span></span><br><span class="line">v10.3.0</span><br><span class="line">[atuyosi@mba-mid2012-4 ~] $ npm --version</span><br><span class="line">6.1.0</span><br></pre></td></tr></table></figure><h3><span id="hexoのインストール">Hexoのインストール</span><a href="#hexoのインストール" class="header-anchor">#</a></h3><p>Hexoのインストール。<code>-g</code>を指定することで<code>/usr/local/bin</code>に<code>hexo</code>コマンドがインストールされます。</p><figure class="highlight console"><table><tr><td class="code"><pre><span class="line"><span class="meta">$</span><span class="bash"> sudo npm install hexo-cli -g</span></span><br></pre></td></tr></table></figure><h3><span id="コンテンツを置くディレクトリの初期化">コンテンツを置くディレクトリの初期化</span><a href="#コンテンツを置くディレクトリの初期化" class="header-anchor">#</a></h3><p><code>&lt;dir-naame&gt;</code>は任意のディレクトリ名。</p><figure class="highlight console"><table><tr><td class="code"><pre><span class="line"><span class="meta">$</span><span class="bash"> hexo init &lt;dir-name&gt;</span></span><br></pre></td></tr></table></figure><p>引数に指定したディレクトリに移動。</p><figure class="highlight console"><table><tr><td class="code"><pre><span class="line"><span class="meta">$</span><span class="bash"> <span class="built_in">cd</span> &lt;dir-name&gt;</span></span><br></pre></td></tr></table></figure><p>以下のコマンドでモジュールのインストール。</p><figure class="highlight console"><table><tr><td class="code"><pre><span class="line"><span class="meta">$</span><span class="bash"> npm install</span></span><br></pre></td></tr></table></figure><p>以下、バージョン情報。  </p><figure class="highlight avrasm"><table><tr><td class="code"><pre><span class="line">$ hexo --version</span><br><span class="line"><span class="symbol">hexo:</span> <span class="number">3.7</span><span class="number">.1</span></span><br><span class="line">hexo-<span class="keyword">cli</span>: <span class="number">1.1</span><span class="number">.0</span></span><br><span class="line"><span class="symbol">os:</span> Darwin <span class="number">17.5</span><span class="number">.0</span> darwin x64</span><br><span class="line"><span class="symbol">http_parser:</span> <span class="number">2.8</span><span class="number">.0</span></span><br><span class="line"><span class="symbol">node:</span> <span class="number">10.3</span><span class="number">.0</span></span><br><span class="line"><span class="symbol">v8:</span> <span class="number">6.6</span><span class="number">.346</span><span class="number">.32</span>-node<span class="number">.9</span></span><br><span class="line"><span class="symbol">uv:</span> <span class="number">1.20</span><span class="number">.3</span></span><br><span class="line"><span class="symbol">zlib:</span> <span class="number">1.2</span><span class="number">.11</span></span><br><span class="line"><span class="symbol">ares:</span> <span class="number">1.14</span><span class="number">.0</span></span><br><span class="line"><span class="symbol">modules:</span> <span class="number">64</span></span><br><span class="line"><span class="symbol">nghttp2:</span> <span class="number">1.29</span><span class="number">.0</span></span><br><span class="line"><span class="symbol">napi:</span> <span class="number">3</span></span><br><span class="line"><span class="symbol">openssl:</span> <span class="number">1.1</span><span class="number">.0</span>h</span><br><span class="line"><span class="symbol">icu:</span> <span class="number">61.1</span></span><br><span class="line"><span class="symbol">unicode:</span> <span class="number">10.0</span></span><br><span class="line"><span class="symbol">cldr:</span> <span class="number">33.0</span></span><br><span class="line"><span class="symbol">tz:</span> <span class="number">2018</span>c</span><br></pre></td></tr></table></figure><h3><span id="動作チェック">動作チェック</span><a href="#動作チェック" class="header-anchor">#</a></h3><p>Hexoのサーバーを起動してみます。</p><figure class="highlight routeros"><table><tr><td class="code"><pre><span class="line">$ hexo<span class="built_in"> server </span>--draft</span><br></pre></td></tr></table></figure><p><code>http://localhost:4000/</code>にアクセスして、テスト用のページが表示されればOKです。</p><h2><span id="git-リポジトリのセットアップ">git リポジトリのセットアップ</span><a href="#git-リポジトリのセットアップ" class="header-anchor">#</a></h2><h3><span id="初期化">初期化</span><a href="#初期化" class="header-anchor">#</a></h3><p>Bitbucket経由でデプロイするのでgitリポジトリを初期化しておく。</p><figure class="highlight console"><table><tr><td class="code"><pre><span class="line"><span class="meta">$</span><span class="bash"> git init</span></span><br></pre></td></tr></table></figure><p>gitの管理対象から外すファイルを<code>.gitignore</code>に書き込みます。</p><figure class="highlight console"><table><tr><td class="code"><pre><span class="line"><span class="meta">$</span><span class="bash"> <span class="built_in">echo</span> <span class="string">"/public"</span> &gt;&gt; .gitignore</span></span><br><span class="line"><span class="meta">$</span><span class="bash"> <span class="built_in">echo</span> <span class="string">"/node_modules"</span> &gt;&gt; .gitignore</span></span><br></pre></td></tr></table></figure><p><code>public</code>ディレクトリは生成されたHTMLファイルの格納先ですが、Netlify側で<code>hexo g</code>コマンド（後述）を実行してHTMLファイルを生成するためgitの管理対象から除外します。  </p><p><code>node_modules</code>ディレクトリについてもNetlify側で必要なモジュールがセットアップされるためgitの管理対象から除外です。</p><figure class="highlight console"><table><tr><td class="code"><pre><span class="line"><span class="meta">$</span><span class="bash"> git add -a</span></span><br></pre></td></tr></table></figure><p>この時点でコミットしておきます。</p><figure class="highlight shell"><table><tr><td class="code"><pre><span class="line"><span class="meta">$</span><span class="bash"> git commit -m <span class="string">'First commit'</span></span></span><br></pre></td></tr></table></figure><h3><span id="リモートリポジトリの設定">リモートリポジトリの設定</span><a href="#リモートリポジトリの設定" class="header-anchor">#</a></h3><p>bitbucketまたはgithubでリポジトリを作成しておきます。</p><figure class="highlight dockerfile"><table><tr><td class="code"><pre><span class="line">$ git remote <span class="keyword">add</span><span class="bash"> origin Git_Repository_URL</span></span><br></pre></td></tr></table></figure><p><code>Git_Repository_URL</code>を自分のgit リポジトリのURLに変更。</p><p>bitbucketの例を示しておきます。</p><figure class="highlight vim"><table><tr><td class="code"><pre><span class="line">$ git remote <span class="built_in">add</span> origin git@bitbucket.<span class="built_in">or</span><span class="variable">g:</span>ユーザー名/リポジトリ名</span><br></pre></td></tr></table></figure><p>設定の確認は</p><figure class="highlight shell"><table><tr><td class="code"><pre><span class="line"><span class="meta">$</span><span class="bash"> git remote -v</span></span><br></pre></td></tr></table></figure><p>あとは記事を作成後、リモートリポジトリに<code>git push -U</code>、Netlify側で関連付けるリポジトリを選択してせってすれば完了。</p><h2><span id="hexoの基本設定">Hexoの基本設定</span><a href="#hexoの基本設定" class="header-anchor">#</a></h2><p>各種プラグインのインストールと設定。</p><h3><span id="設定ファイルの編集">設定ファイルの編集</span><a href="#設定ファイルの編集" class="header-anchor">#</a></h3><p>設定ファイルを修正する。</p><figure class="highlight console"><table><tr><td class="code"><pre><span class="line"><span class="meta">$</span><span class="bash"> vim _config.yml</span></span><br></pre></td></tr></table></figure><p>設定ファイル<code>_config.yml</code>を編集し、基本的な項目を設定します。</p><figure class="highlight yaml"><figcaption><span>_config.yml</span></figcaption><table><tr><td class="code"><pre><span class="line"><span class="comment"># Site</span></span><br><span class="line"><span class="attr">title:</span> <span class="string">ブログのタイトル</span></span><br><span class="line"><span class="attr">subtitle:</span> <span class="string">サブタイトル</span></span><br><span class="line"><span class="attr">description:</span> <span class="string">metaタグ用の詳細説明</span></span><br><span class="line"><span class="attr">keywords:</span> <span class="string">キーワード（カンマ区切りで列挙）</span></span><br><span class="line"><span class="attr">author:</span> <span class="string">任意</span></span><br><span class="line"><span class="attr">language:</span> <span class="string">ja</span></span><br><span class="line"><span class="attr">timezone:</span> <span class="string">Asia/Tokyo</span></span><br></pre></td></tr></table></figure><p>項目名のとおりですが、一応説明。</p><ul><li>title: ブログのタイトル</li><li>subtitle: ブログのサブタイトル</li><li>description: 説明</li><li>keywords: カンマ区切りでキーワードを列挙。SEO対策。</li><li>author: 著者名</li><li>language: アルファベット2文字で言語を設定（ISO 639-1形式）（デフォルトは”en”）</li><li>timezone: タイムゾーンを指定</li></ul><p>description および keywords はSEO甩です。</p><h2><span id="記事の作成">記事の作成</span><a href="#記事の作成" class="header-anchor">#</a></h2><p>本来の基本的な流れは</p><ol><li>hexo new draft “記事タイトル”</li><li>hexo publish </li><li>hexo server –draft</li><li>hexo generate</li><li>hexo deploy</li></ol><p>となります。この記事のようにサーバー側でページを生成する場合は手順2の<code>publish</code>、手順4の<code>generate</code>は不要です。</p><p>hexo publishではなく、<code>git mv</code>または単に<code>mv</code>コマンドでファイルを<code>source/_post</code>にファイルを配置して<code>git commit</code>、<code>git push</code>。</p><p>サーバー側でリポジトリの更新をチェックして<code>hexo generate</code>コマンドが実行され、<br>HTMLページが生成される形になります。</p><p>なお、各コマンドには省略形が用意されています。例えば、<code>hexo server</code>に対して<code>hexo s</code>など。それぞれのサブコマンドの最初の一文字です。</p><h2><span id="デプロイ">デプロイ</span><a href="#デプロイ" class="header-anchor">#</a></h2><p>前述のとおり、<code>hexo deploy</code>は使用しません。</p><figure class="highlight maxima"><table><tr><td class="code"><pre><span class="line">$ git <span class="built_in">push</span> <span class="built_in">origin</span> master</span><br></pre></td></tr></table></figure><p>または</p><figure class="highlight shell"><table><tr><td class="code"><pre><span class="line"><span class="meta">$</span><span class="bash"> git push -U</span></span><br></pre></td></tr></table></figure><p>2回目からは<code>git push</code>。</p><h2><span id="netlify側の設定">Netlify側の設定</span><a href="#netlify側の設定" class="header-anchor">#</a></h2><p>まず<a href="https://app.netlify.com/sites" target="_blank" rel="noopener">Netlify</a>にログインし、新規サイトの作成画面へ。</p><p>連携するサービスを選ぶ画面で使用しているサービスを選択するとリポジトリ選択画面に切り替わるのでブログ記事をpushしたリポジトリを指定します。</p><p>基本的に画面の指示に従えば問題ないはず。</p><p>Netlify側の作業は公式サイトを参照。</p><p><a href="https://www.netlify.com/blog/2015/10/26/a-step-by-step-guide-hexo-on-netlify/" target="_blank" rel="noopener">A Step-by-Step Guide: Hexo on Netlify | Netlify</a></p><h2><span id="まとめ">まとめ</span><a href="#まとめ" class="header-anchor">#</a></h2><p>以上で完了です。あとはHexoの詳細設定とテーマのカスタマイズ。  </p><p>記事を書いて<code>hexo s</code>でプレビューして<code>git push</code>して公開するという手順を繰り返すしていくことになります。</p>]]></content>
    
    <summary type="html">
    
      &lt;p&gt;静的ページジェネレーター、Hexoと、無料ホスティングサイトのNetlifyでサイトを構築します。&lt;/p&gt;
    
    </summary>
    
      <category term="IT" scheme="http://blog.machine-powers.net/categories/IT/"/>
    
    
      <category term="Hexo" scheme="http://blog.machine-powers.net/tags/Hexo/"/>
    
      <category term="Netlify" scheme="http://blog.machine-powers.net/tags/Netlify/"/>
    
  </entry>
  
  <entry>
    <title>ブログの移行開始</title>
    <link href="http://blog.machine-powers.net/2018/06/02/first-entry/"/>
    <id>http://blog.machine-powers.net/2018/06/02/first-entry/</id>
    <published>2018-06-02T00:26:28.000Z</published>
    <updated>2018-09-30T15:06:38.258Z</updated>
    
    <content type="html"><![CDATA[<p>はてなブログの有料プランでも悪くないですが、細かいところでUIに不満があるのと、いかんせんコストパフォーマンスがいまいちなので移行テスト、です。</p><p><a href="https://hexo.io/" target="_blank" rel="noopener">Hexo</a>を使用しています。</p><p>テーマを探しているところです。</p>]]></content>
    
    <summary type="html">


        &lt;p&gt;はてなブログの有料プランでも悪くないですが、細かいところでUIに不満があるのと、いかんせんコストパフォーマンスがいまいちなので移行テスト、です。&lt;/p&gt;
&lt;p&gt;&lt;a href=&quot;https://hexo.io/&quot; target=&quot;_blank&quot; rel=&quot;noopener&quot;
      
    
    </summary>
    
      <category term="雑記" scheme="http://blog.machine-powers.net/categories/life/"/>
    
    
  </entry>
  
</feed>